How to connect a landing page form with an automation workflow?
An automation workflow allows you to send welcome emails to new subscribers and start a workflow when someone submits their data via form.
To connect your landing page form with an automation workflow, you must first create a template for your welcome email, an automation workflow triggered by a form submission and a landing page with a form.
Creating a template
- To create a template, go to the “Templates” tab and click “New template”.
- Choose a suitable template or an example welcome email template.
- Design the styles and text of the template to fit your brand.
Read more about creating templates from our drag-and-drop template creation guide.
Setting up an automation workflow
- To set up an automation workflow, go to the “Automations” tab and click “New automation”.
- Give the workflow a name (displyed only to the user) and set “Form submitted” as the trigger.
- Next choose the action “Send message”.
- Set up the element to send a message by adding a subject, from address, from name and choose the previously created welcome email as the template.
- Once the automation workflow is set up, save the automation and launch it in the automations view.
To connect the automation workflow to a form, you’ll need the workflow ID. Get the automation workflow ID by opening the workflow and copying the number at the end of the URL – that’s the ID.
An example ID:
subdomain.sendsmaily.net/automation/overview/id/32 – 32 is the ID
Connecting an automation workflow with a form
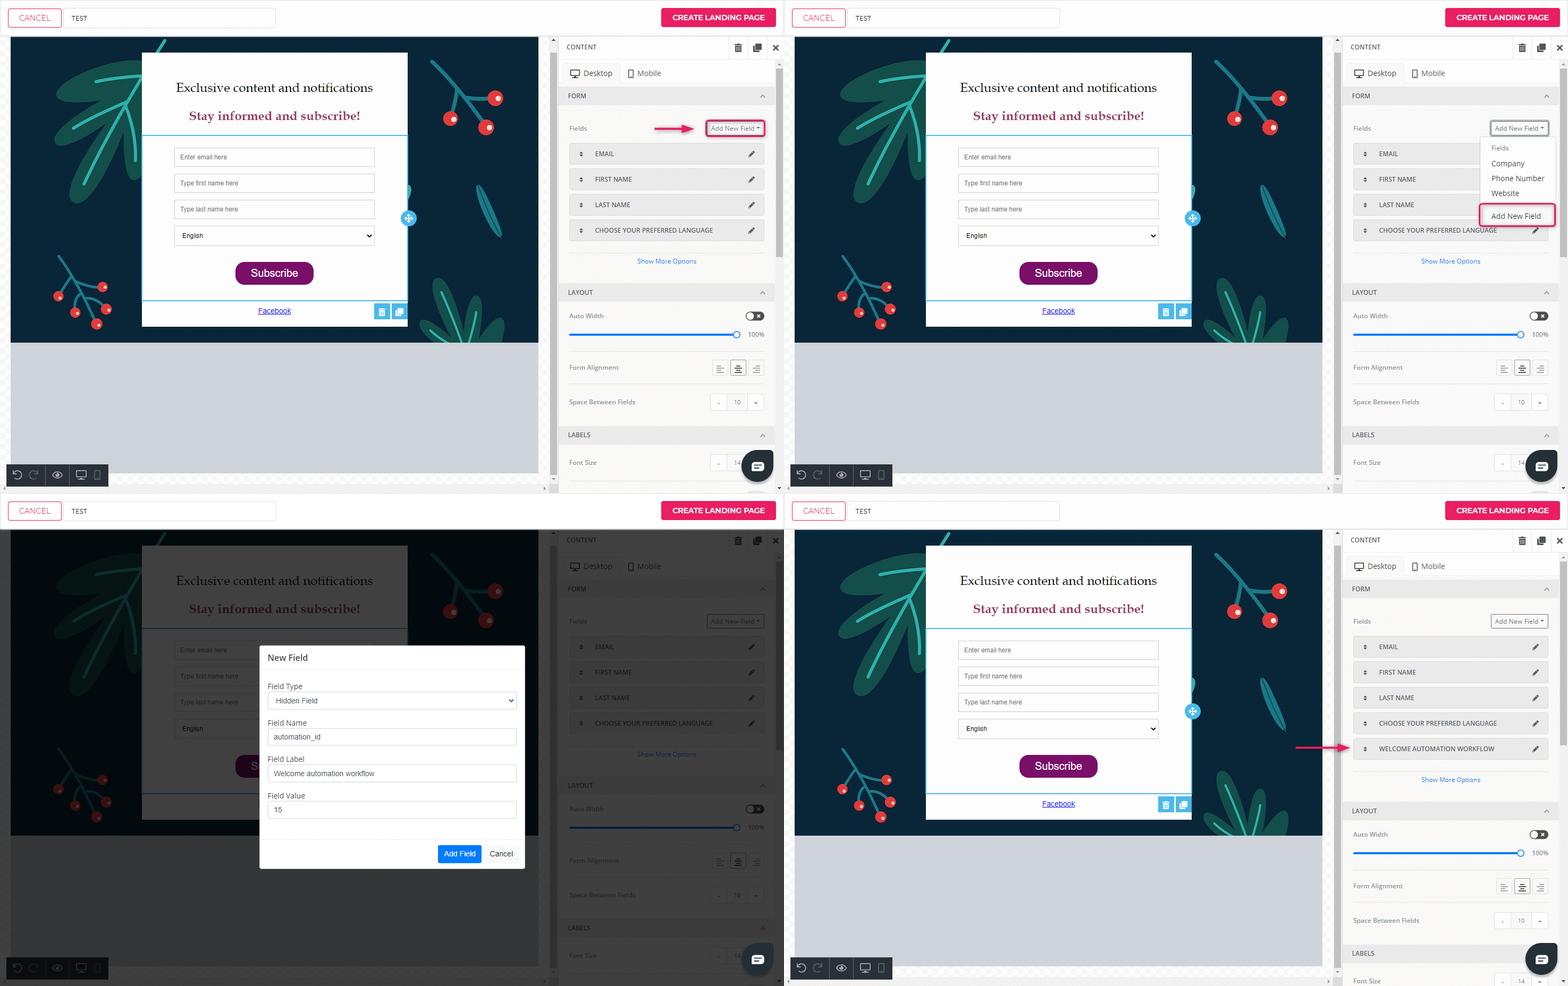
- To connect the automation workflow to a form, open the landing page and click on the form element.
- Add a new field to the form.
- Choose “Hidden field” as the field type.
- Name the field “automation_id”
- Choose a label for the field (e.g. Automation)
- The value of the field should be automation ID (the number from the automation URL address)
- Once the field has been added, save the landing page and test the form out.
