You can add Smaily newsletter subscription forms to Voog website using landing pages or example opt-in code.
Adding landing page form with button
You can create a newsletter subscription form using Smaily landing pages tool. Learn how to create a form on a landing page.
Adding a button and linking the form
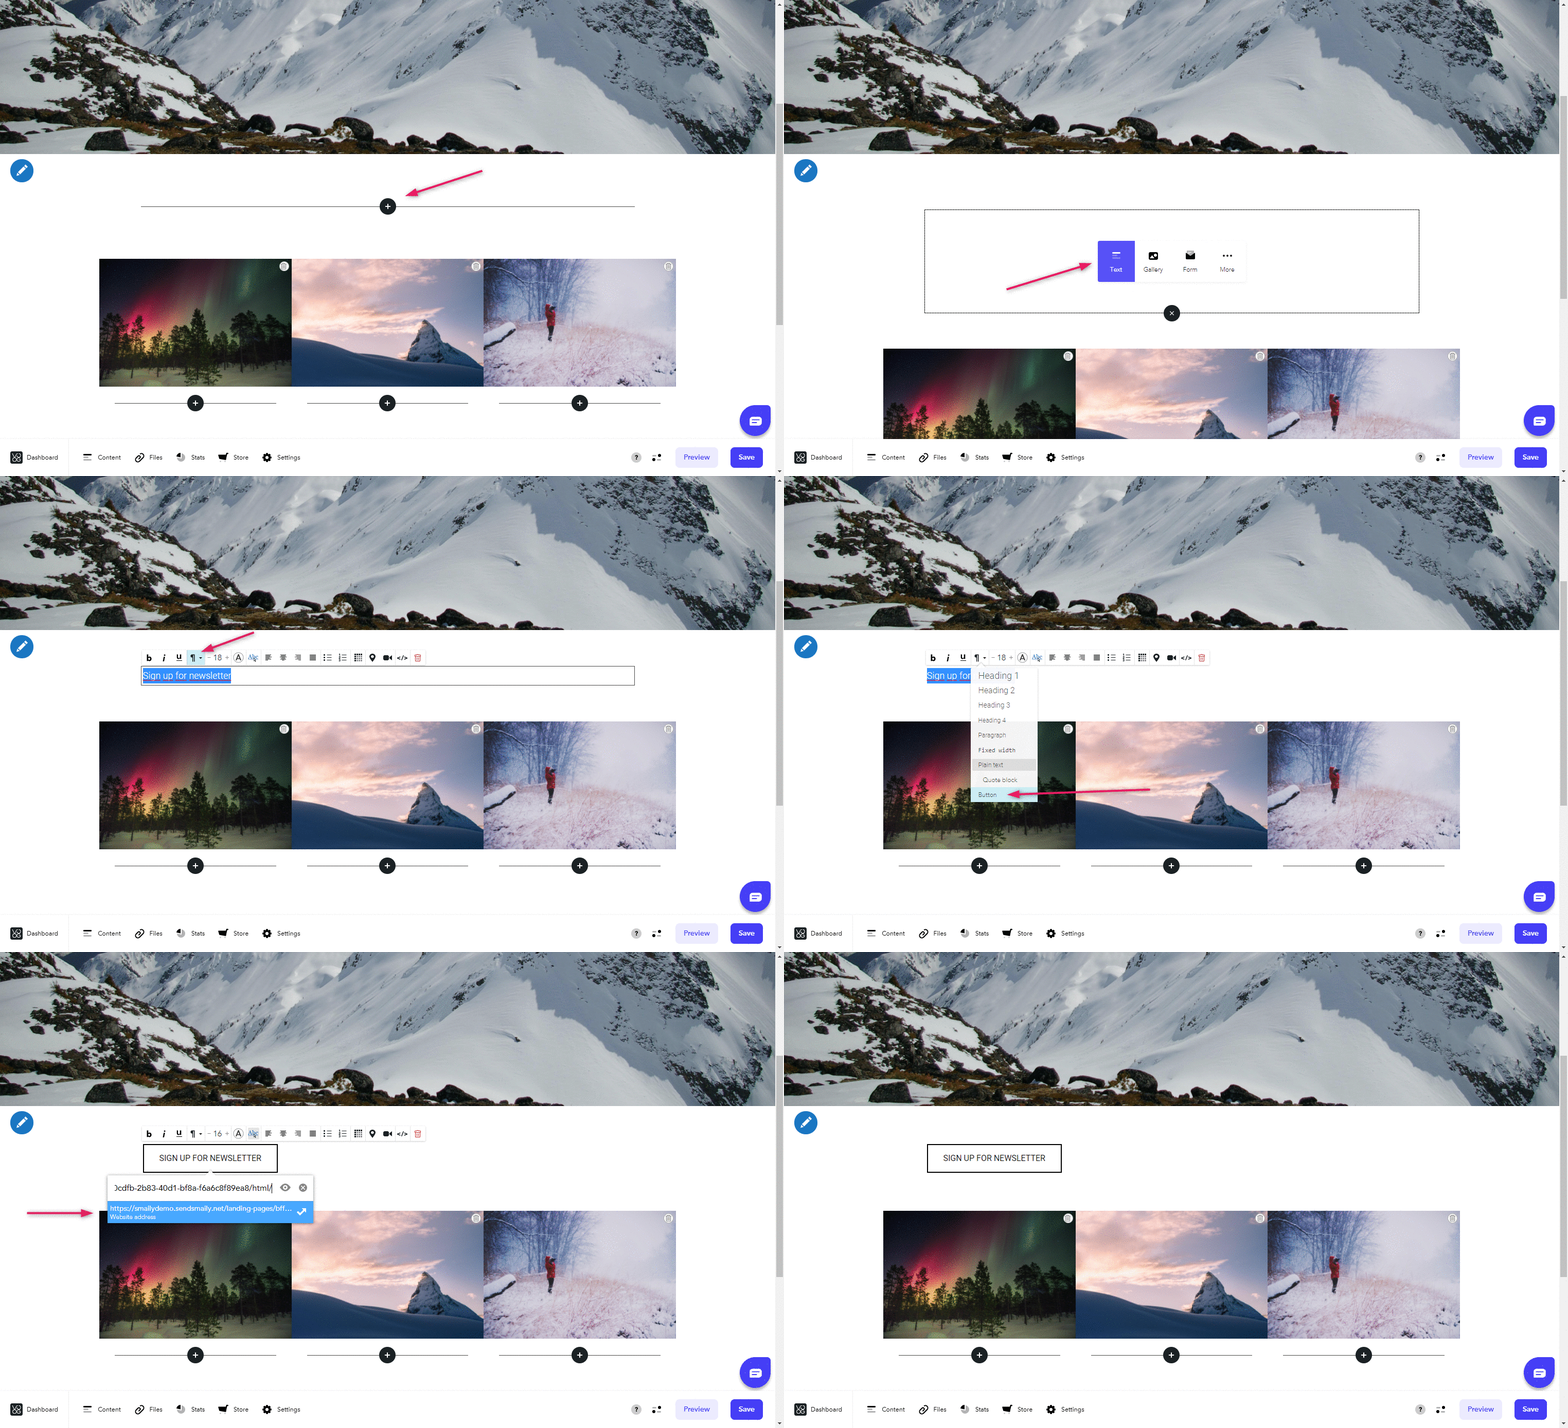
- Click on “Edit site” button.
- Choose the page, you wish to add the newsletter subscription button to.
- Add a “text” element to desired spot.
- In the text field, write “Sign up for newsletter” or something similar. This text will be added to the button later.
- Select all the text and in the text editor menu click on “Styles” (¶).
- Choose “button” from the drop-down menu.
- The text will be converted to button. Click on the button and add the landing page url in place of #.
- Save changes and under preview you can test the newsletter subscription button. When clicking on the button it should direct you to the landing page.
If you are using a template that does not have button option under the style menu, you can add a newsletter subscription button through a “video” option.
- Click on “Edit site” button.
- Choose the page, you wish to add the newsletter subscription button to.
- Add a “text” element to desired spot.
- Click on “Insert a video” on the text editor menu.
- Copy the code below and insert your landing page url.
- <a href=”LANDING_PAGE_URL” class=”custom-btn”>Sign up for newsletter</a>
- Click on insert. Newsletter subscription button should be added to the page.
- Save changes and preview the page to test the newsletter subscription.
Adding landing page form with iframe
Another option is to add the form directly to your webpage with iframe.
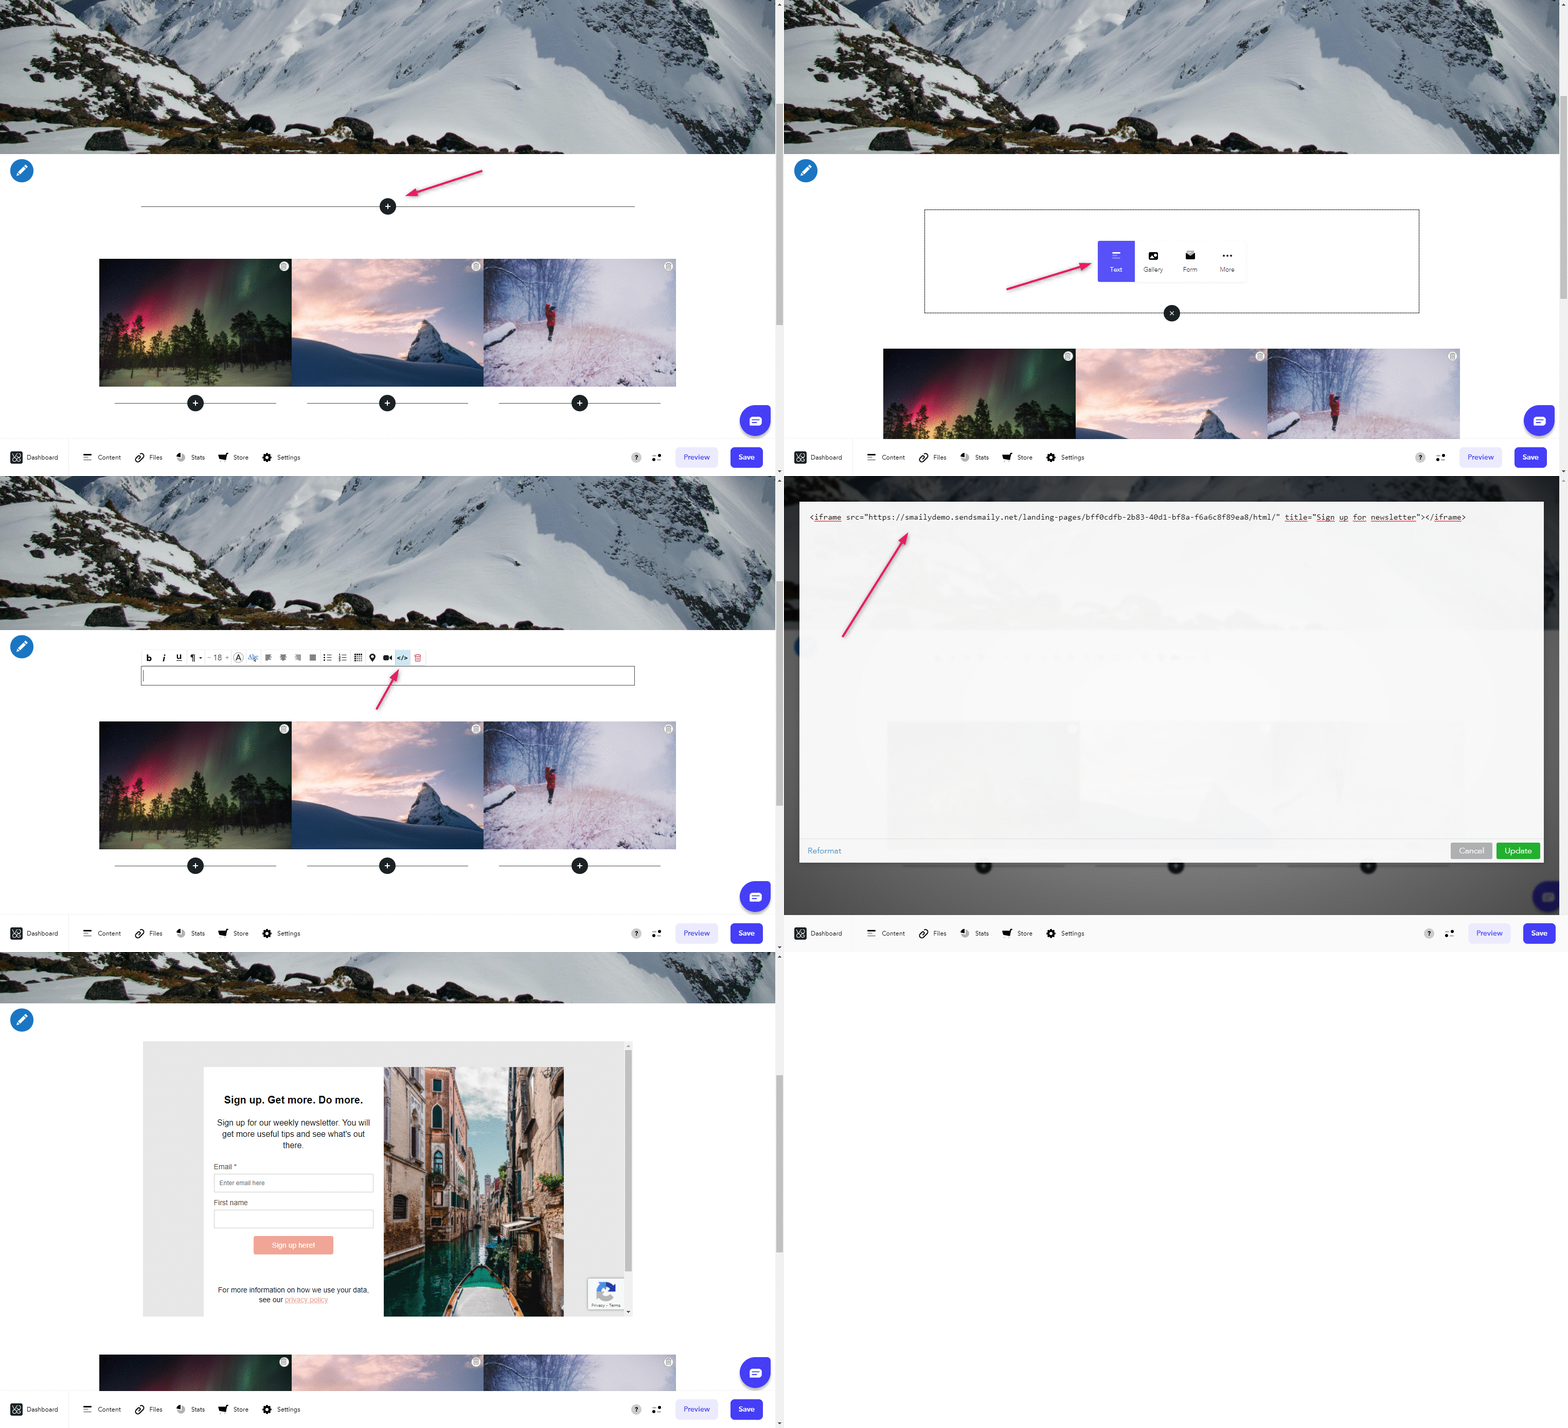
- Click on “Edit site” button.
- Choose the page, you wish to add the newsletter subscription button to.
- Add a “text” element to desired spot.
- Click on “Edit HTML source” on the text editor menu.
- Copy the code below and insert your landing page url.
- <iframe src=”LANDING_PAGE_URL” title=”Sign up for newsletter”></iframe>
- Click on “update”. Newsletter subscription form should be added to the page.
- You can adjust the iframe size by dragging the little dots on the borders.
- Save changes and preview the page to test the newsletter subscription.
Adding newsletter subscription form with opt-in code
If you wish to add the newsletter subscription form directly to your webpage without using iframes and landing pages, you can also use our HTML opt-in example code.
You can add the form using either code element or through text element’s “Edit HTML source” option.
Form code with default style:
<form action="https://<domain>.sendsmaily.net/api/opt-in/" method="post" autocomplete="off">
  <div style="display:none">
    <input type="hidden" name="key" value="XDcsks...3sz" />
    <input type="hidden" name="autoresponder" value="1" />
    <input type="hidden" name="source" value="web" />
    <input type="hidden" name="success_url" value="http://www.domeen.ee/ok" />
    <input type="hidden" name="failure_url" value="http://www.domeen.ee/error" />
    <input type="text" name="re-email" value="" />
  </div>
  <div class="form_area">
    <div class="form_fields">
      <div class="form_field form_field_required  ">
        <label class="form_field_label" for="email">E-mail</label>
        <input class="form_field_textfield form_field_size_medium" name="email" type="email" value="" />
      </div>
      <div class="form_field">
        <label class="form_field_label" for="name">Nimi</label>
        <input class="form_field_textfield form_field_size_medium" name="name" type="text" value="" />
      </div>
     </div>
    <div class="form_submit">
      <input class="form_submit_input" name="commit" type="submit" value="Liitu" />
    </div>
  </div>
</form>
Or see the example code here.
| Parameter | Value |
| domain | Smaily account subdomain name. E.g if your account url is demo.sendsmaily.net, then you need to add demo |
| key | Key string that you can get from your account settings. Recommended. |
| autoresponder | Automation workflow ID. Used to trigger "form submitted" automation workflow for welcome emails. Optional. |
| success_url | Redirection location for a successful subscription. Required. |
| failure_url | Redirection location for an un-successful subscription. Required. |
| source | Hidden field. Used to define the source of contact sign-up (web, Facebook, etc.). Optional |


