Installation
- You can get Smaily email marketing and automation extension module for Prestashop from Smaily’s Git repository.
https://github.com/sendsmaily/smaily-prestashop-module/releases - Download the .zip file for the latest release.
- In your Prestashop, go to Modules – Modules manager – Upload a module. Drag and drop or add from you computer the Smaily for Prestashop .zip file.
- It should show “Module installed” message, if everything was successful.
- Click “Configure” to set up the module.
Another option to add the Smaily for Prestashop module is to
- Download the .zip file for the latest release. Extract the contents of the archive to a ‘smailyforprestashop’ folder.
- Upload the ‘smailyforprestashop’ folder to your webserver’s modules folder.
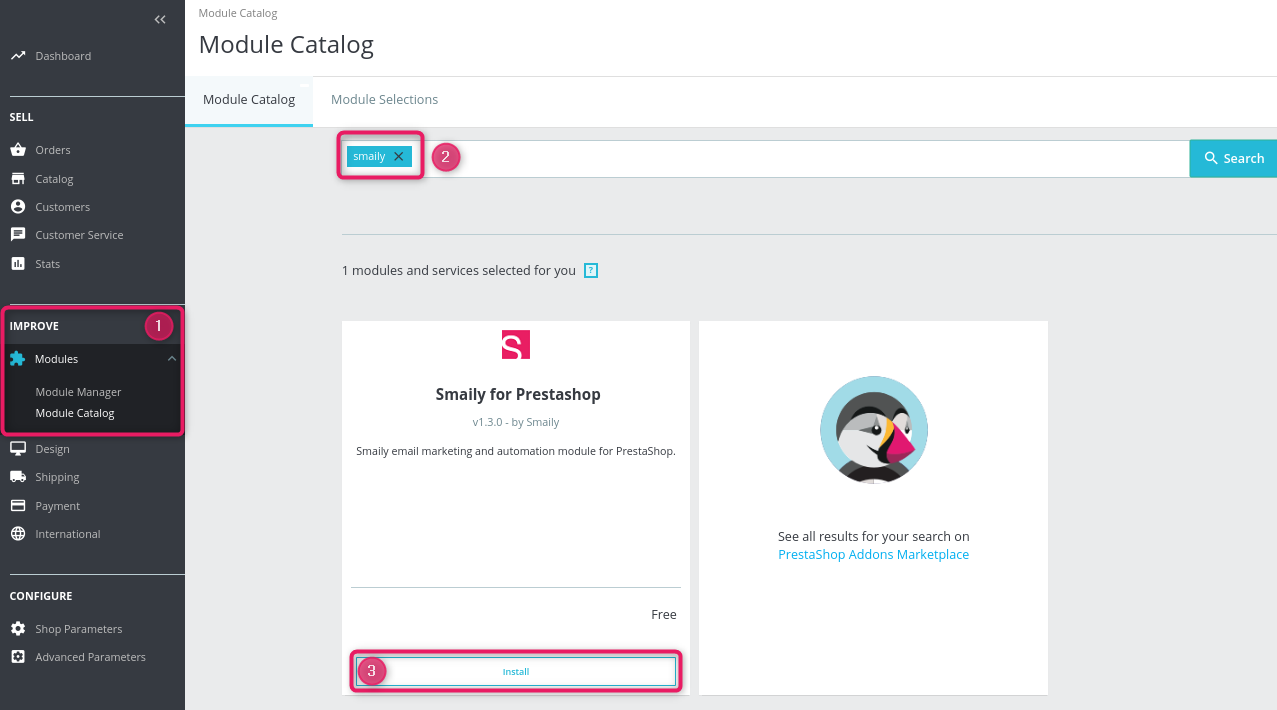
- Navigate to Modules -> Module Catalog. Search for ‘smaily’ and click install.
Connecting integration to Smaily account
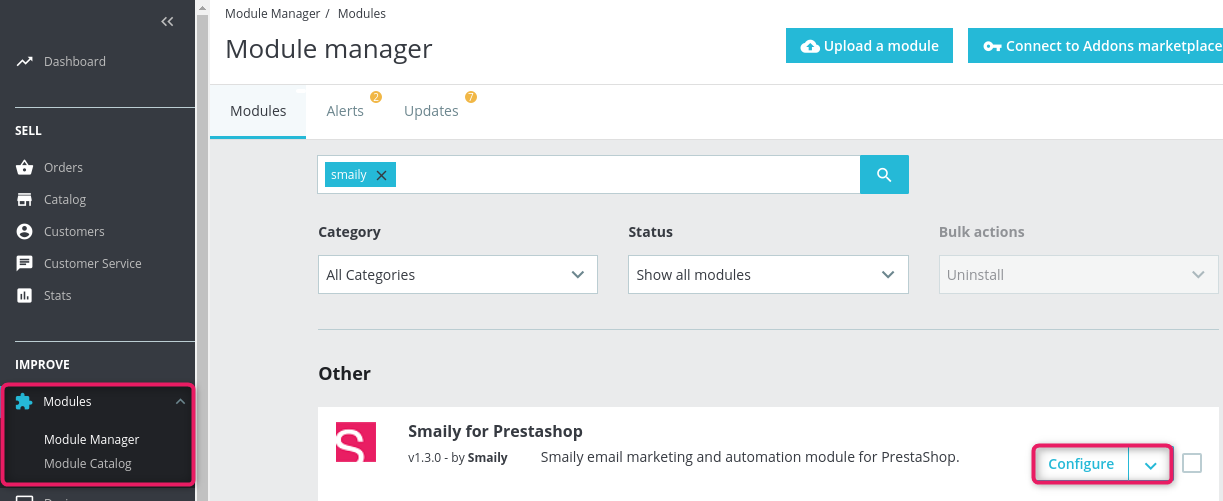
To connect PrestaShop integration with Smaily, go to Modules -> Module Manager and click configure on Smaily for Prestashop.
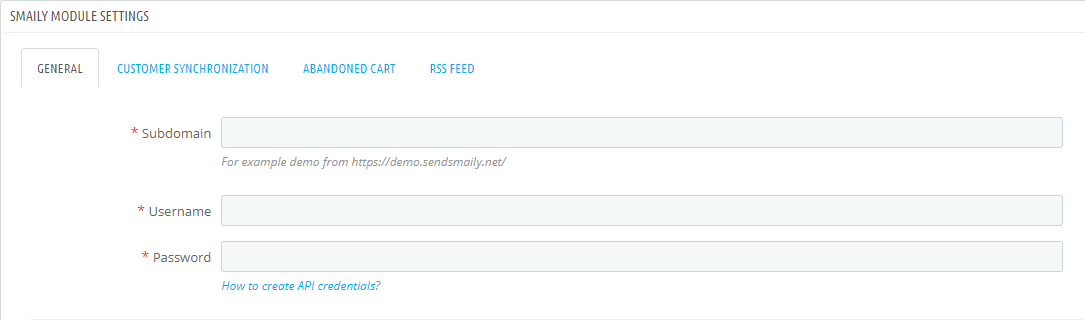
On extension configuration page enter your Smaily API credentials – subdomain, username, and password. You must create your API account in Smaily first. After that, you can validate connection by saving configuration.
Newsletter subscription form
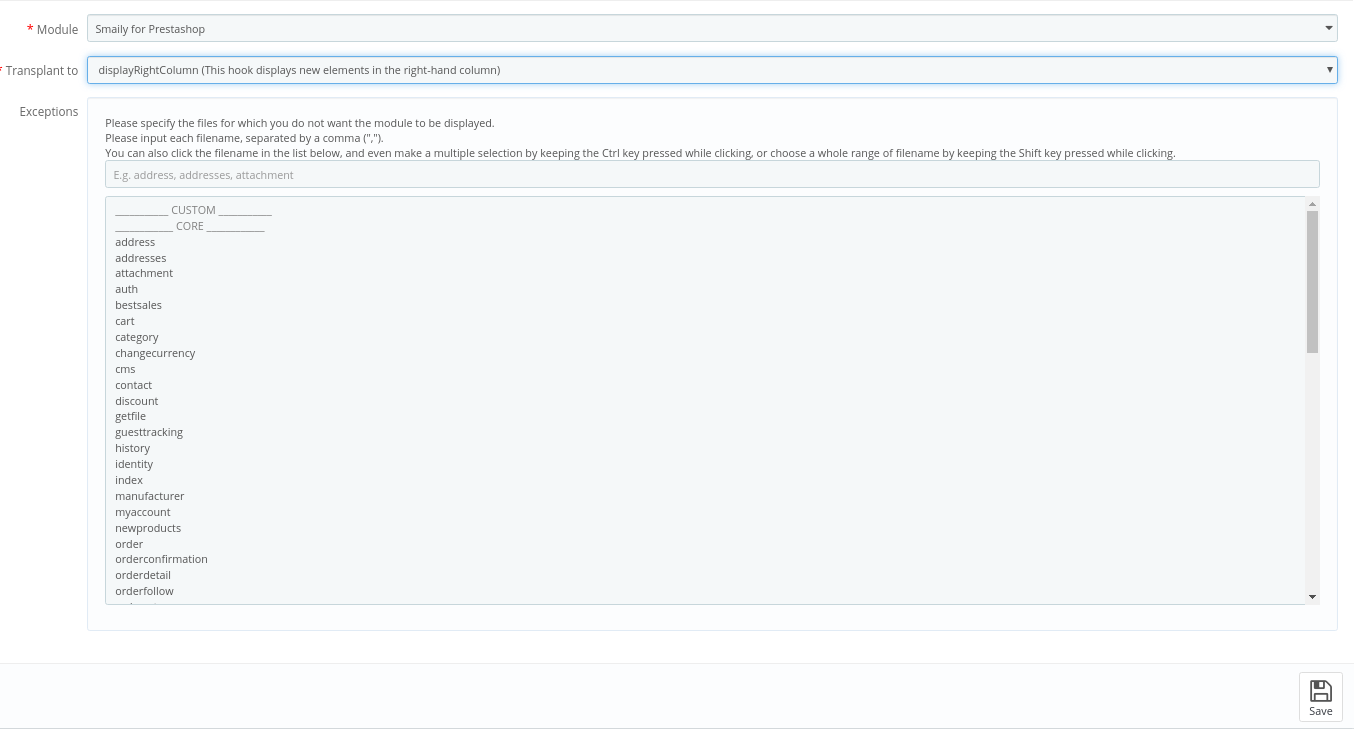
Navigate to Design -> Positions and click on ‘Transplant a module’
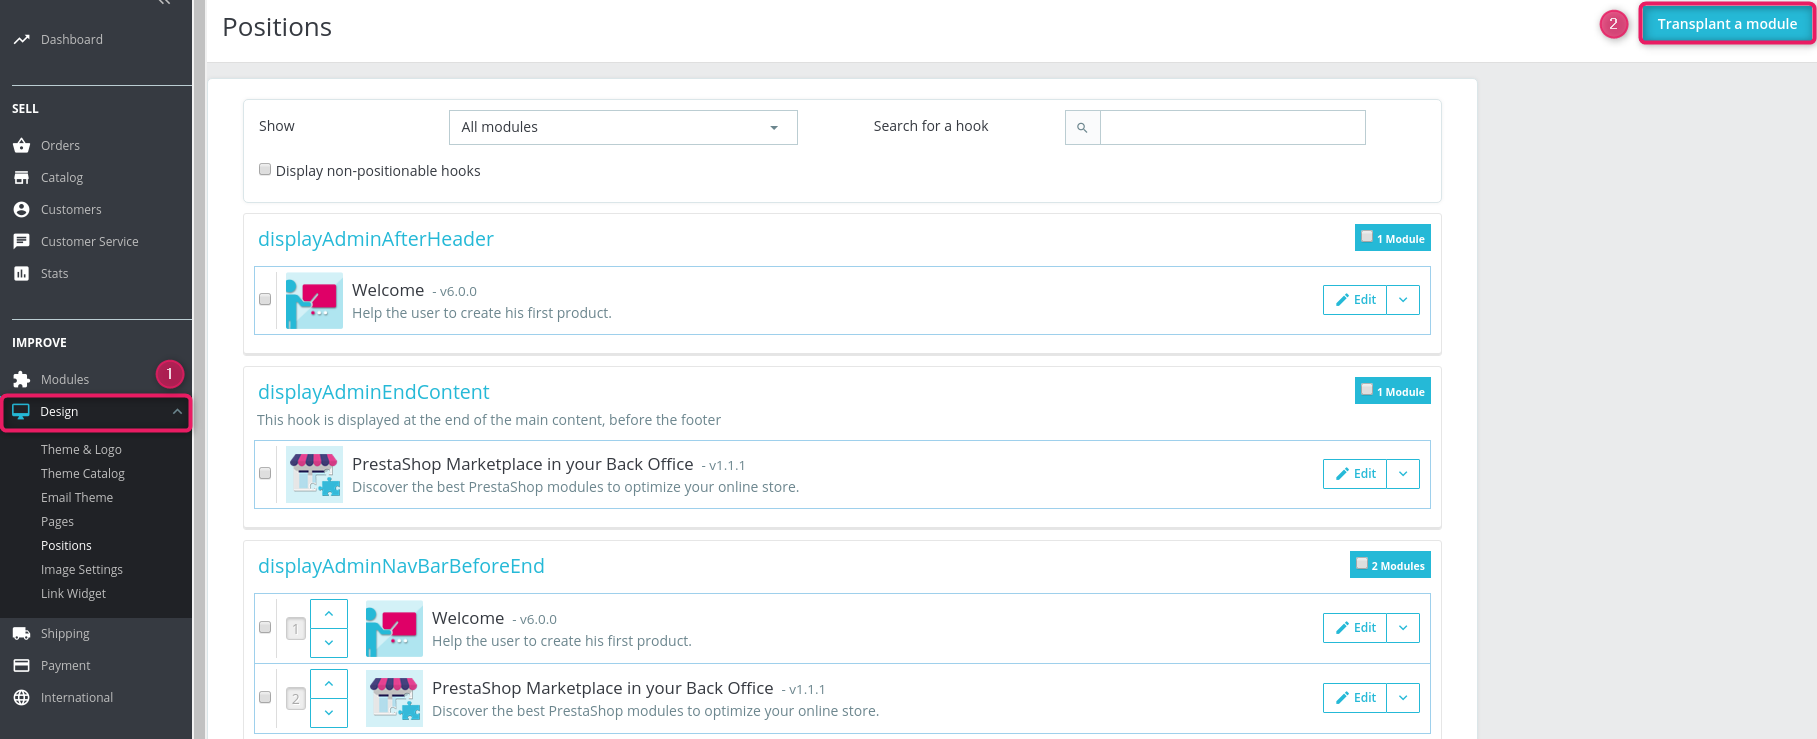
Select Smaily for Prestashop for ‘Module’ and the preferred form location for ‘Transplant to’. Click Save and the Smaily newsletter form should be on your store at the specified location!
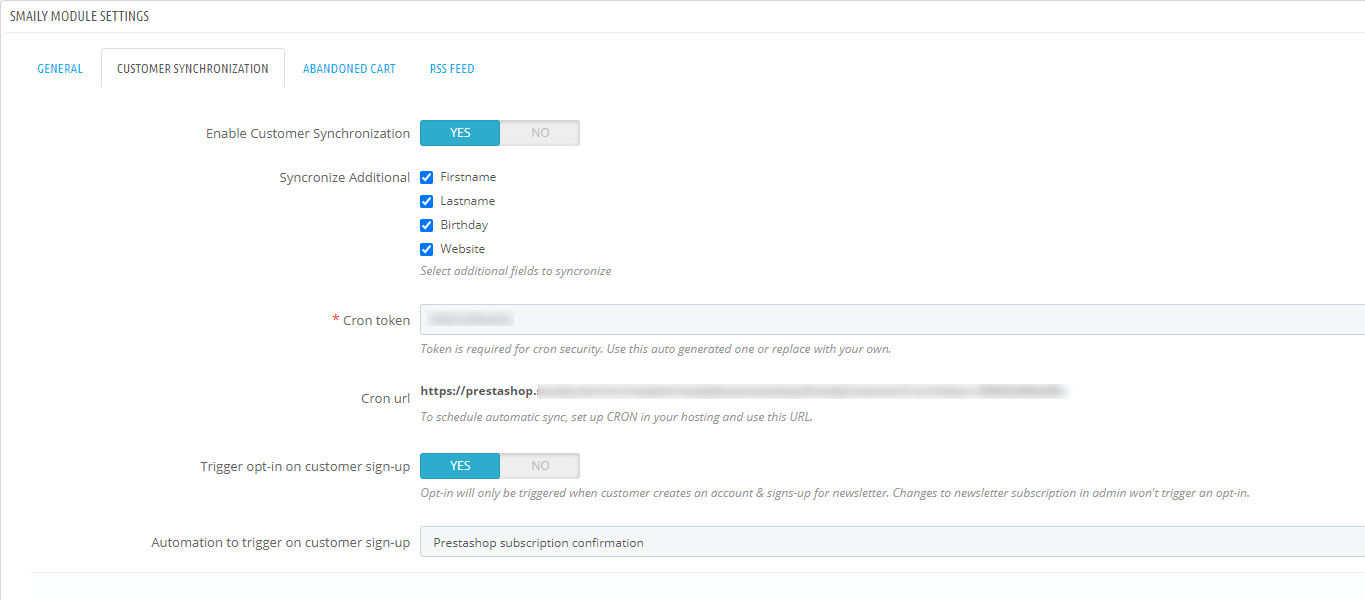
Customer synchronization
Enable customer synchronization to collect newsletter subscribers directly to your Smaily account, under customer synchronization tab.
There is an option to import additional fields available from the store into Smaily to personalize newsletter emails.
The synchronization can be automated using the cron URL. Recommended synchronization interval is once a day or less.
New customers who sign up with newsletter enabled can be added to Smaily by enabling trigger opt-in on customer signup. Switch it to”yes” to enable it.
An autoresponder can be selected for “opt-in on customer sign-up”, this will only be triggered if the previous option is enabled. After creating automation in Smaily you can find this automation under “Automation to trigger on customer sign-up”. Learn how to create welcome email automation workflow.
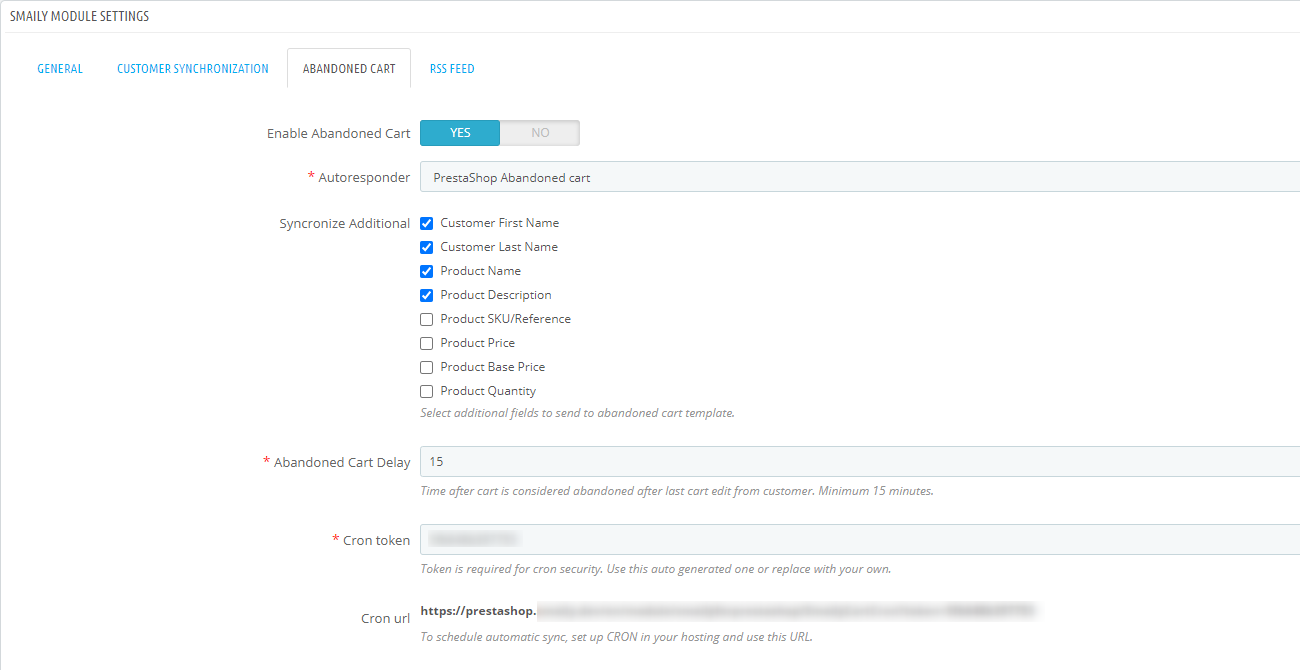
Abandoned Cart
Enable abandoned cart emails feature under Abandoned Cart tab to send cart reminder emails to store customers.
You need to create an abandoned cart template and form submitted automation workflow in Smaily prior to activating this feature. You can follow our creating abandoned cart automation workflow manual.
After creating automation in Smaily you can find this automation under Autoresponder ID.
There is an option for selecting additional fields for the Smaily template to personalize abandoned cart emails.
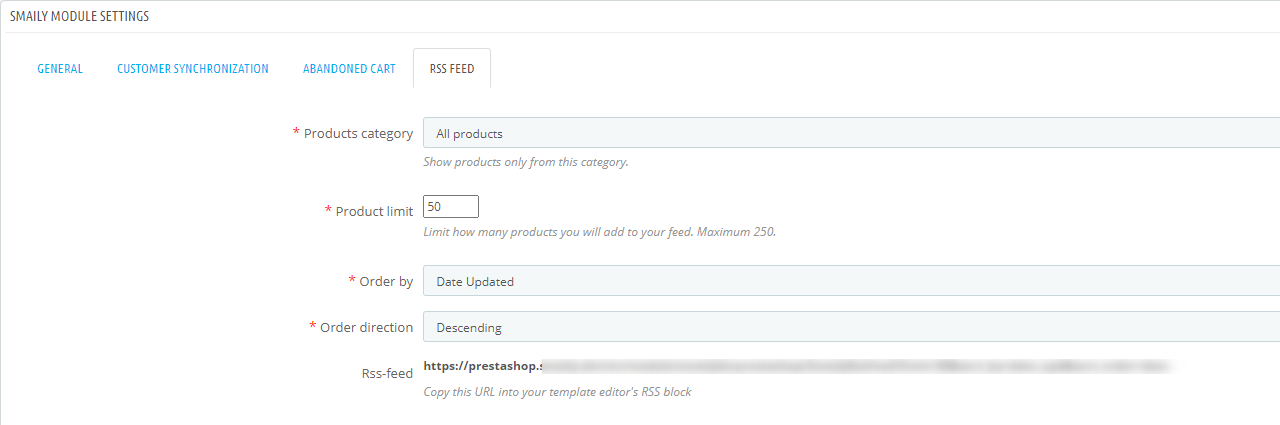
Generate product RSS-feed
The RSS-feed can be found under RSS feed tab.
Product RSS-feed allows you to effortlessly import up to 250 latest products to Smaily template. You can customize generated RSS-feed based on product categories and limit generated RSS-feed products amount with preferred value. You can also modify the layout with “Order by” and “Order direction” selection options.
To use the feed, copy the URL into Smaily template editors RSS block. Read more about Smaily RSS-feed element.