Example using AddEvent:
- Create a new account or log in at https://www.addevent.com/. You can choose Free plan to start testing.
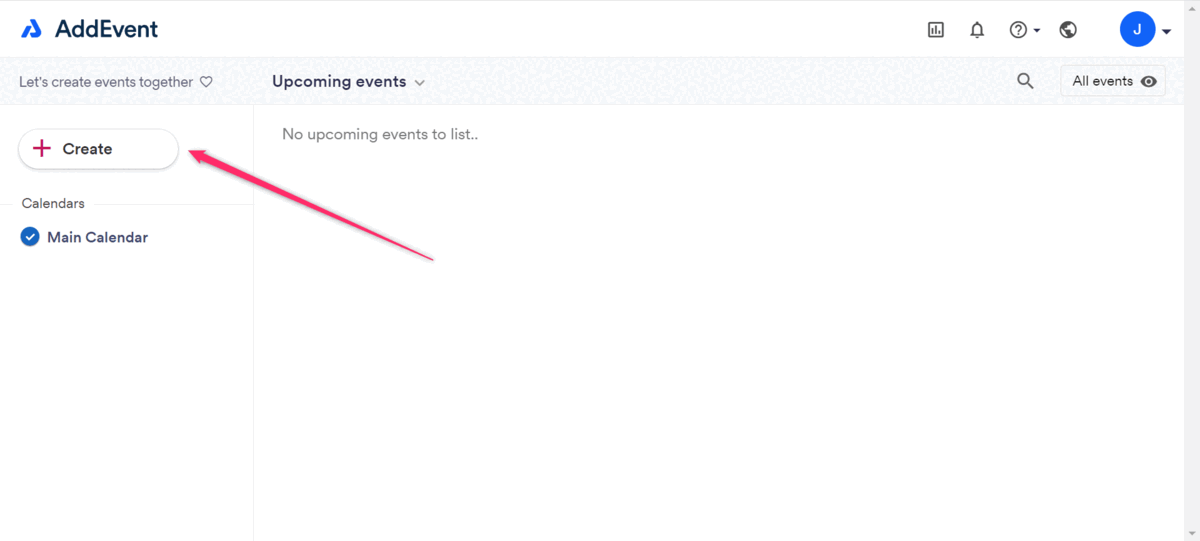
- Find the “Create” button and click on it. Then choose “Event”.
- Add your event name in the “Title of your event” field.
- Choose the event beginning and ending time. Make sure to choose the correct time zone.
- Fill in the other information if necessary.
- Make sure that the contact person and email address are correct and your company’s information.
- Click on “Create”.
Now you can see the event information view.
- Find section “Add to Calendar links (for emails, newsletters and campaigns)”
- You can choose the calendar button styles, by clicking on the numbers 1 or 2 under the calendar icons section.
- To get the buttons code, click on <> icon.
- Copy all the code in the pop-up window.
- Open your template in Smaily, where you want to insert calendar buttons.
- Drag an HTML element in the preferred spot in the template and open the code editor by clicking on the pencil icon.
- Insert the whole code there.
- Click on “OK” to save the code and you should see the icons in the template now.
If you wish to change the “Add event to calendar” text above the calendar buttons re-open the HTML element’s editor.
Find this code section in the first part of the code <p style="margin:0px 0px 10px 0px;text-align:center;font-size:17px;line-height:150%;color:#000;font-weight:bold;">Add event to calendar</p>
Change the text between the > and < tags where the adding text is and save the changes by clicking “OK”