
Overview
SPF (Sender Policy Framework) is an email authentication method, which lets the owner of the domain control who has the right to send emails under a specific domain name.
DKIM (DomainKeys Identified Mail) is an email authentication method which guarantees that the subject, content, sender and recipient address of the message have not been changed during the sending process.
If SPF and DKIM records have been set up correctly, they give the receiving email server a signal that the email being sent is an authentic email and comes from a credible source. This helps improve the reputation of the domain and may also improve the delivery rate of emails sent from that domain.
In addition to SPF and DKIM, starting from 2024, larger senders will be required to use DMARC authentication as well (Gmail has required this for senders with 5000 or more daily emails; Yahoo has not disclosed its volume requirement).
DMARC is an email authentication protocol that allows the domain owner to protect their domain from unauthorized use. It is built on SPF and DKIM, and depending on DMARC configuration, either or both 3rd party SPF and DKIM must be configured.
These records must be added in your domain’s DNS server in your domain’s hosting service.
Adding SPF records
To add Smaily’s SPF record, find the existing SPF record in your domain’s DNS settings.
- Then the following addition must be made to the existing record (add the Smaily’s record before ~all):
include:_spf.smaily.com
In case there is no SPF record on the Domain name server administration page, add a new record:
Record: (leave empty)
Type: TXT
Value: v=spf1 a mx include:_spf.smaily.com ~all
Once the SPF record has been added, it may take a minimum of an hour to propagate. Thus, you should allow some time before sending out a new post.
To avoid problems regarding the delivery of your emails, you must ensure that the SPF record contains the IP-addresses of all of the service servers, which send emails under that specific domain. Consult your IT-support to determine all the services.
Check the performance of the SPF record with MxToolBox SPF Check. In the “Domain Name” field add the domain to which you added the SPF record to. Then click “SPF Record Lookup”.
Adding DKIM records
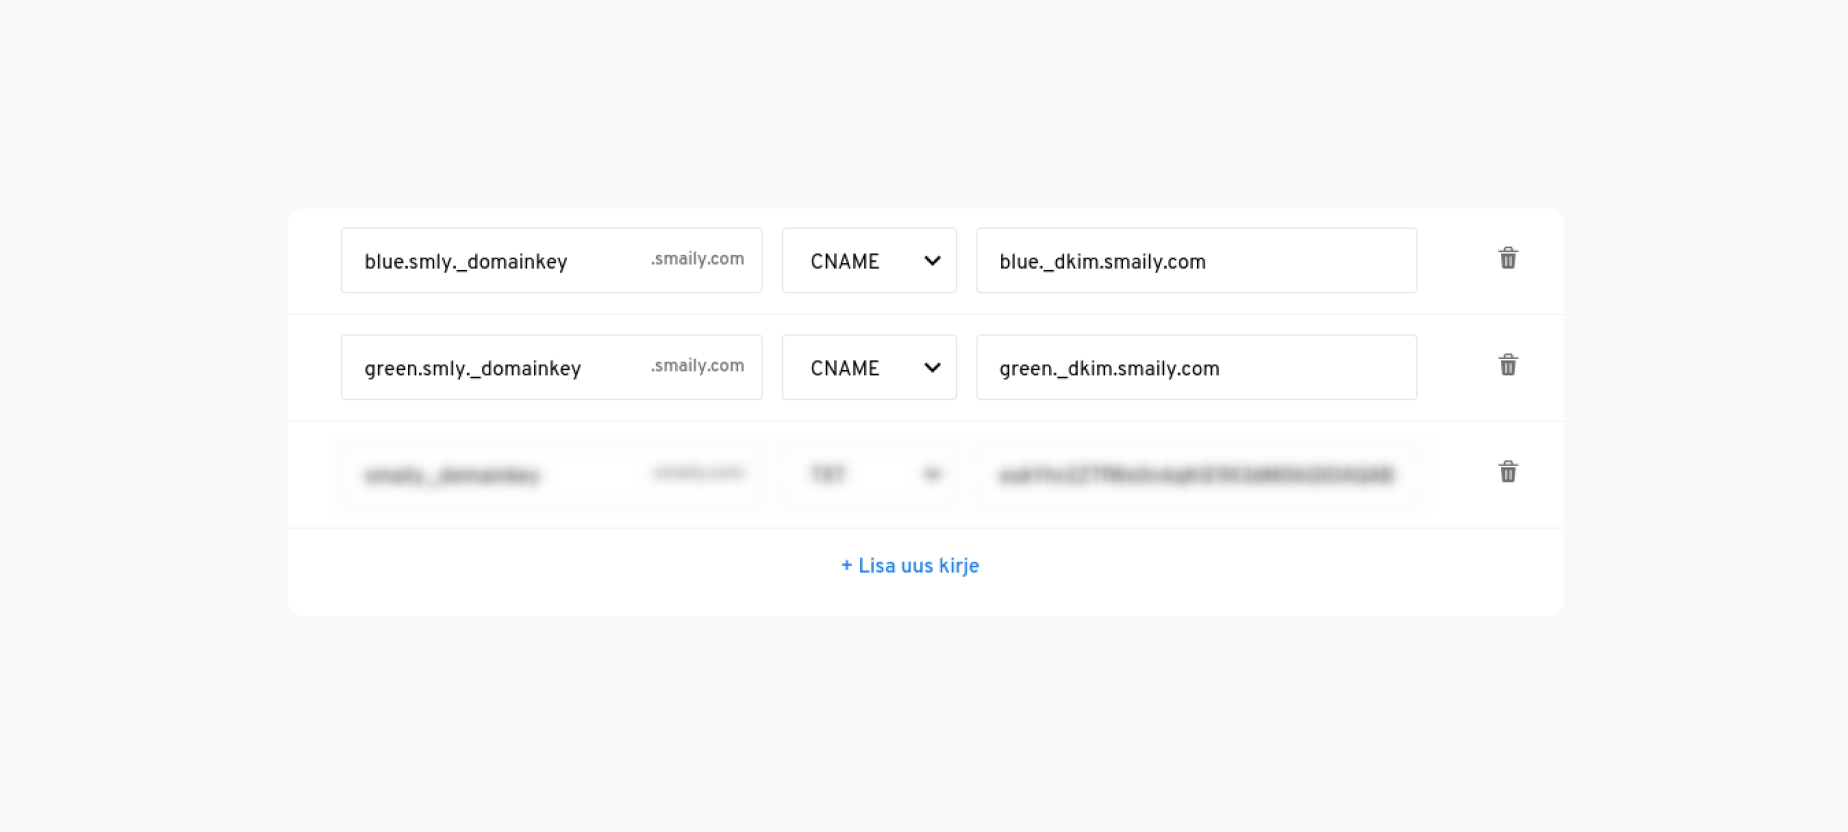
Enable DKIM signing by creating two new CNAME records under DNS record settings. NB! Both records must be added to your domain!
| Record | Type | Value |
| blue.smly._domainkey | CNAME | blue._dkim.smaily.com |
| green.smly._domainkey | CNAME | green._dkim.smaily.com |
Adding a DMARC record
Configuring DMARC is a more complex process involving security protocol settings and options for collecting reports. We recommend reading Google’s guide for a complete, most understandable overview.
Here’s a step-by-step guide:
1. Check SPF and DKIM Records: Before setting up DMARC, ensure that you have SPF (Sender Policy Framework) and DKIM (DomainKeys Identified Mail) records already in place for your domain. These are prerequisites for DMARC.
2. Create a DMARC record. For that you need to add a TXT record with _dmarc subdomain (for example _dmarc.example.com) to your domain’s DNS. The DMARC record defines your domain’s policy and typically the content of this record includes the following components:
v=DMARC1: Indicates that this is a DMARC record.p: Specifies the policy, which can be one of the following:none: Only monitoring, no action is taken.quarantine: Suspicious emails are treated as spam.reject: Emails that fail DMARC authentication are blocked.
rua: Defines an email address where aggregate reports will be sent. These reports contain information about email authentication results and should be monitored for insights.
The policy in your DMARC record tells email servers how to handle messages that don’t pass DMARC authentication. It’s recommended to start with a none policy to monitor the impact before moving to stricter policies.
Sample DMARC record: v=DMARC1; p=none; rua=mailto:youremail@example.com
(You should replace “youremail@example.com” with the email address where you want to receive DMARC aggregate reports.)
You can use online DMARC record generation tools to create your record.
3. Publish the DMARC Record: Add the DMARC record to your domain’s DNS settings. This process varies depending on your DNS or hosting provider.
4. Test Your DMARC Record: Use DMARC record testing tools available online to ensure your record is valid and correctly configured.
5. Monitor DMARC Reports: After implementing DMARC, you will receive aggregate reports (XML files) at the email address specified in the DMARC record’s “rua” field. These reports provide valuable information about your email ecosystem, including identifying who sends emails on your behalf (various software, systems, and potentially malicious users).
6. Adjust Your DMARC Policy: Based on the reports, you may decide to tighten your DMARC policy over time from none to quarantine or reject to enhance security.
Note! Remember, incorrect setup of DMARC can impact your email deliverability, so it’s crucial to proceed carefully and monitor the effects of any changes you make. If you’re not confident in doing this yourself, consulting with an IT professional or your domain provider for assistance might be a good idea.
Checking if the records have been added correctly
After adding SPF and DKIM records to your domain you can check in Smaily, if the records have been correctly added.
- Go to your Smaily account and open your account’s settings.
- Navigate to the domains tab and next to the domain, click on the “Authenticate” button to start the process. Note! It may take up to 15 minutes to check the records on the domain.

Refresh the page after 15 to 20 minutes to see the results. If the records were correctly added then you should see a green checkmark and “Authenticated” text next to the domain.
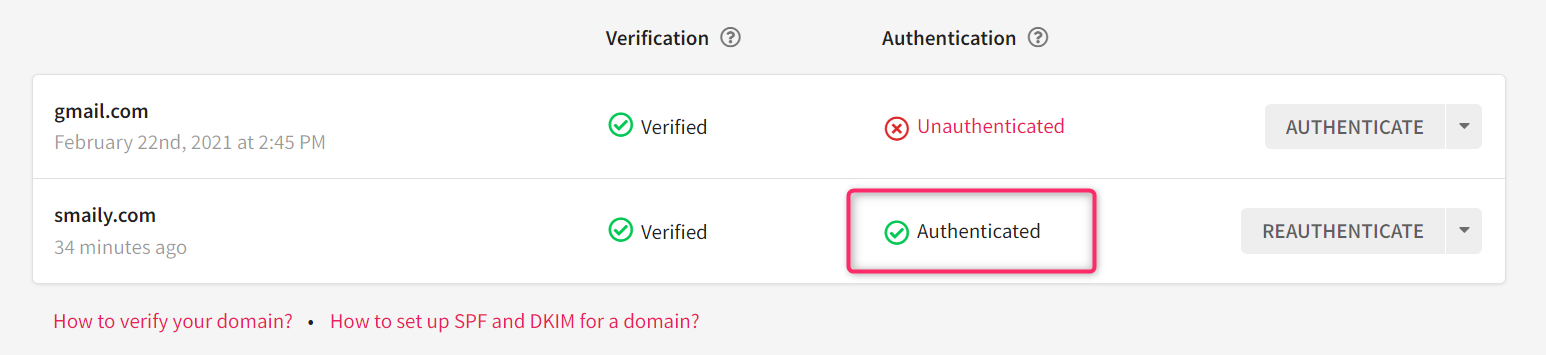
Note! Sometimes it might take longer than 15 minutes. If the checkmark does not turn green and it still says “Unauthenticated” even after half an hour, click on the “Unauthenticated” text to see which records are missing.
Contact us for more information at support@smaily.com