How to change the default unsubscribe page?
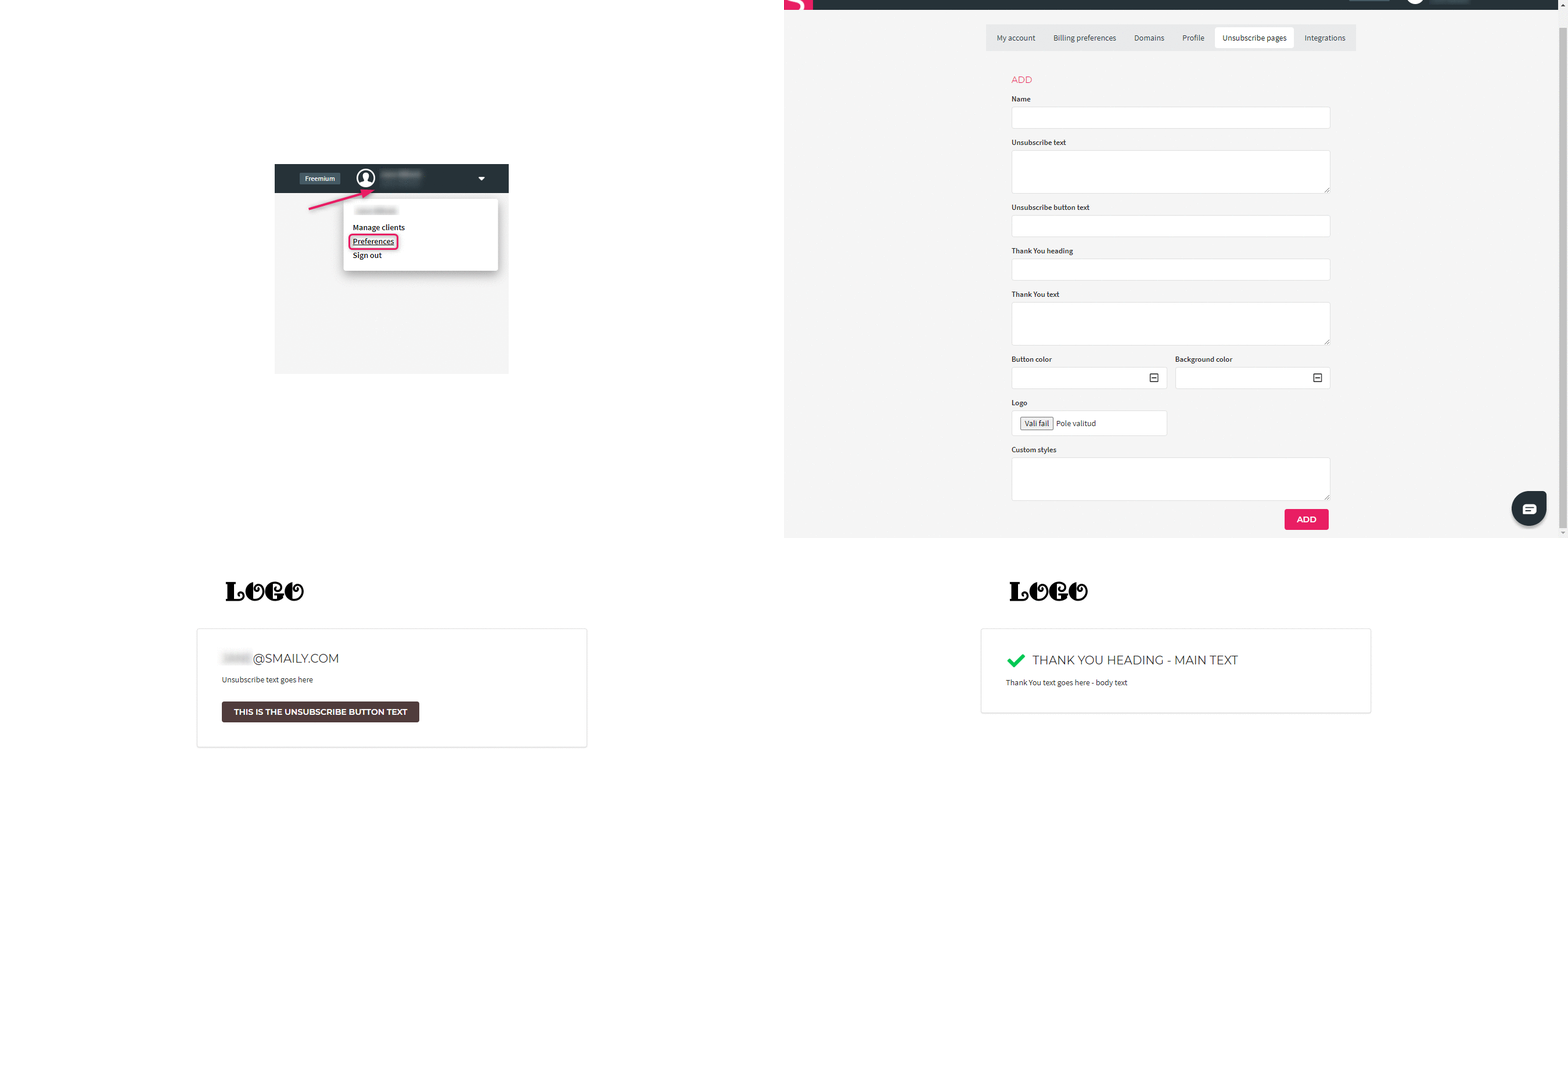
You can make some changes to the system unsubscribe page. Modify unsubscribe page’s body and button texts, add your own logo and styles, and also thank you page texts.
- Click on the account name in the upper right corner.
- Click “Settings” in the dropdown menu.
- Choose “Unsubscribe pages”.
- In the settings view you can change the look of your unsubscribe page.
- Add a name to your unsubscribe page. Visible only to account users.
- Add unsubscribe page text.
- Add unsubscribe button text.
- Add Thank You heading – heading text of the confirmation page.
- Add Thank You text – body text of the confirmation page.
- Choose the button color in the “Button color” field.
- Choose the page background color in the “Background color” field.
- You can add your company logo and custom CSS styles.
- To confirm changes, click “Add”.
- To see the final result, send a test campaign to your email address.
– Start creating the campaign as usual.
– At the last step, choose the previously created unsubscribe page under “Unsubscribe theme”.
– Send a test campaign to yourself.
– Click on the unsubscribe link in the email you’ve received and you’ll see what the unsubscribe page looks like.
If some fields are left empty, then the default text will be added instead.
