Add contacts from Scoro to Smaily
Smaily Zapier integration for Scoro allows you to effortlessly sync new or updated contacts from Scoro to Smaily and manage your subscribers and their data.
In order for Zapier to automate contact synchronization for you, just create a connection between Scoro and Smaily. You can use Smaily premade template that will make the creation of your scenario much easier. You can also expand and customize the scenario to meet your own individual needs.
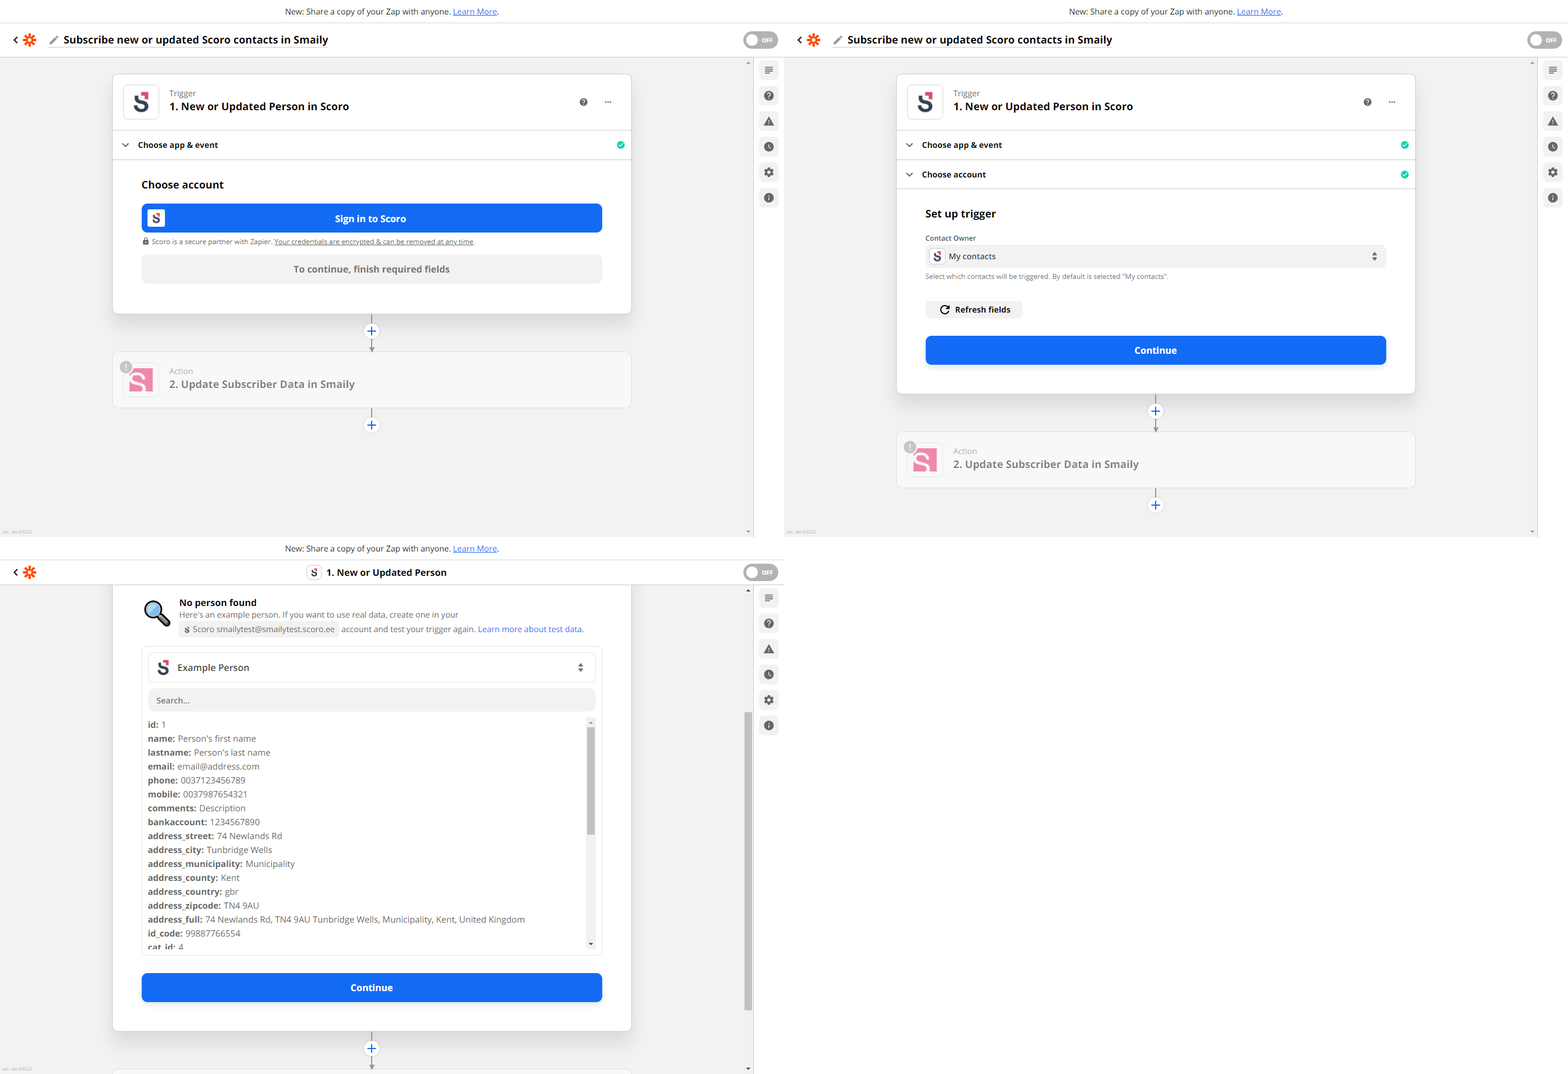
Create a connection with your Scoro account
- Open Scoro – Smaily Zapier template.
- Click on “Sign in to Scoro”.
- Follow the instructions in the pop-up to access your Scoro User Token, Site URL and Company Account Code.
- Fill in the required information and click “Yes, Continue” and then on the template click “Continue”.
- Zapier is now connected to your Scoro account.
Set up trigger
- Leave it set to “My contacts” or choose any other contacts you wish to watch.
- Click continue.
Test trigger
- Click on “Test the trigger” to get the sample data. It should give you sample person details from you Scoro account.
- Click Continue.
Create a connection with your Smaily account
- Choose app & event – App and action event are already set. You can change the action event.
- Click “Continue”.
- Choose account – click “Sing in to Smaily”.
- In the pop-up modal fill in the information as required. You can find Smaily API information under your Smaily account settings. (How to create API credentials).
- Click “Yes, Continue” when everything is set.
Set up action
- Email is a required field.
- Click on email input and choose email field from opened drop-down menu.
- Unsubscribed should stay on “No”.
- Add any additional parameters the same way as email field. First and last name for example have already been mapped for you.
- Click Continue.
Test action
- Click on “Test the action” to get the sample data.
- Now sample person details from you Scoro account are displayed.
- Click Test & Continue.
- Success message is displayed.
- Now click Turn on Zap.
Now your scenario is up and running!


