Installing and configuring the plugin
Smaily Connect plugin allows you to connect your WordPress website, WooCommerce store, Contact Form 7 and Elementor with Smaily email marketing platform. Note! This plugin requires paid plan in Smaily.
Smaily Connect plugin allows you to:
- collect newsletter subscribers on your webpage and store,
- synchronize newsletter subscribers,
- create abandoned cart workflows
- use RSS feed for faster product import.
How to Connect:
- To install Smaily Connect plugin, go to “Plugins” ➝ “Add Plugin” and then type in the search box “Smaily”.
- Choose “Smaily Connect” plugin and click on the button “Install now”.
- Once installation has finished click on “Activate” and find the activated Smaily plugin in “Plugins” page list or on the sidebar menu.
Navigate to Smaily plugin. You need to make a connection between the plugin and your Smaily account.
- To make a connection, open your Smaily account and navigate to account preferences, then integrations tab.
- Click on “Create a new user” button, to create API username and API password.
- Copy subdomain, API username and API password to Smaily Connect plugin’s fields.
- Click on “Make a Connection” to connect the plugin to your Smaily account.
Connection is created!
Setting up subscriber collection
There are multiple options to add a newsletter subscription form to your webpage. Navigate to “Getting started” tab in Smaily plugin to read more information.

1. Smaily subscription form widget
If you are using WordPress native webpage builder you can add the Smaily newsletter subscription form using Smaily Classic Subscription Widget.
- Follow the link in “Getting started” tab or find the widget under “Appearance” → “Widgets” menu.
- Choose the widget area, where you wish to add the newsletter subscription form and click on “+” icon to choose from available blocks.
- Type “Smaily” in the search field and select “Smaily Classic Subscription Widget”
- Add a title to your form, fill out the other fields and choose an automation workflow (if you wish to send welcome messages).
- You can add additional CSS to the form, to change the visuals.
- If everything is ready to go, click on “Update” to save settings.
Form block
You can also use Smaily Opt-In Form block to add the newsletter subscription form to any page or post.
- Choose the page or post you want to add the Smaily Opt-In Form block to.
- Search “Smaily” in the blocks menu.
- Click on the Smaily Opt-In Form block or drag it to the preferred section.
- Customize the Smaily Opt-In Form block in the block menu.
- You can choose to display name field and modify the field texts, success messages, button visuals etc.
- Under Hidden Fields you can add a custom success url and failure url, which are displayed after form submission. You can also connect a welcome automation workflow created in your Smaily account and add custom hidden fields to the form.
- If everything is set up, click on “Save” to save changes.

2. Shortcode
- Navigate to any page or post and start editing.
- Choose the + sign to add a block, then search for the “shortcode” block.
- Copy Smaily subscription form shortcode and save by clicking “Publish”
[smaily_connect_newsletter_form]
Other settings examples:
- Adding success url:
[smaily_connect_newsletter_form success_url="http://www.example.com/?page_id=2"](Note! Default return path is the site’s home url.) - Failure url:
[smaily_connect_newsletter_form failure_url="http://www.example.com/?page_id=2"](Note! Default return path is the site’s home url.) - Name:
[smaily_connect_newsletter_form show_name="true"] - Connecting automation workflow:
[smaily_connect_newsletter_form autoresponder_id="123"]
Note! You can combine multiple options.
3. Custom HTML form
You can also create your own unique subscription form by using our example code. Create a custom HTML form for maximum flexibility and advanced functionality. While this requires more technical knowledge, it gives you complete control over the form’s appearance and behavior. Copy the modified code to an HTML block on any page or post.
You can view the example form here.
4. Contact Form 7 Smaily connector
You can also use Contact Form 7 form builder to create custom forms and connect them to your Smaily account. Follow the link under “Getting Started” tab in Smaily plugin to enable Smaily Opt-In under the Contact Form 7 settings.
- Choose the form under Contact Form 7 plugin.
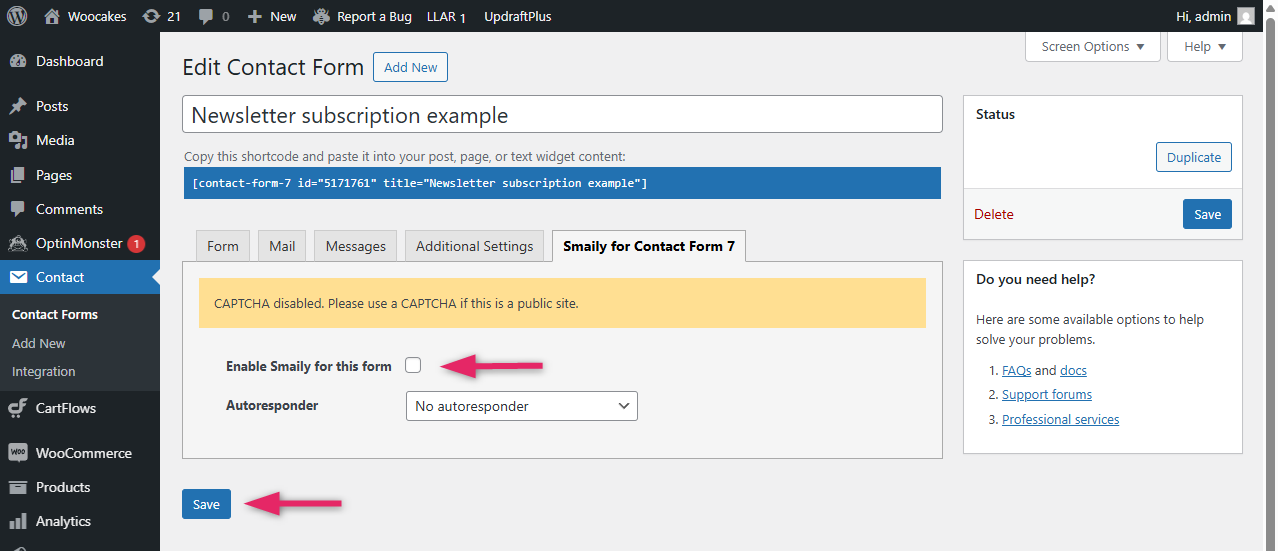
- Navigate to “Smaily for Contact Form 7” tab.
- Click on “Enable Smaily for this form” to activate the connection.
- If you want to send welcome messages, choose the correct autoresponder.
- Click on “Save”.
Note! Make sure you have CAPTCHA activated.
5. Smaily Opt-In Form Elementor widget
You can use the built-in Smaily Opt-In Form widget to generate and style a subscription form in Elementor page builder.
- Choose the page or post you want to add the newsletter subscription form to.
- Choose the section you want to add the widget to and search “Smaily” in the widgets menu.
- Click on the Smaily widget or drag it to the preferred section.
- Customize the newsletter subscription form in the form menu. You can modify both the texts and styles of the form.
- Note! Under “Hidden fields” you can choose a Smaily automation workflow and add a custom success and failure URLs.
- If everything is set up, click on “Publish” to save changes.
6. Smaily landing page iframe block
If you are using block builder editor in WordPress, an alternative method to add custom forms to your page is by using Smaily Landing Page block. This allows you to add a landing paged created in Smaily, as an iframe to any part of your page.
- Choose the page or post you want to add the landing page form to.
- Search “Smaily” in the blocks menu.
- Click on the Smaily Landing page block or drag it to the preferred section.
- Customize the landing page block in the block menu.
- Add your Smaily landing page url and then change the landing page height and width.
- If everything is set up, click on “Save” to save changes.
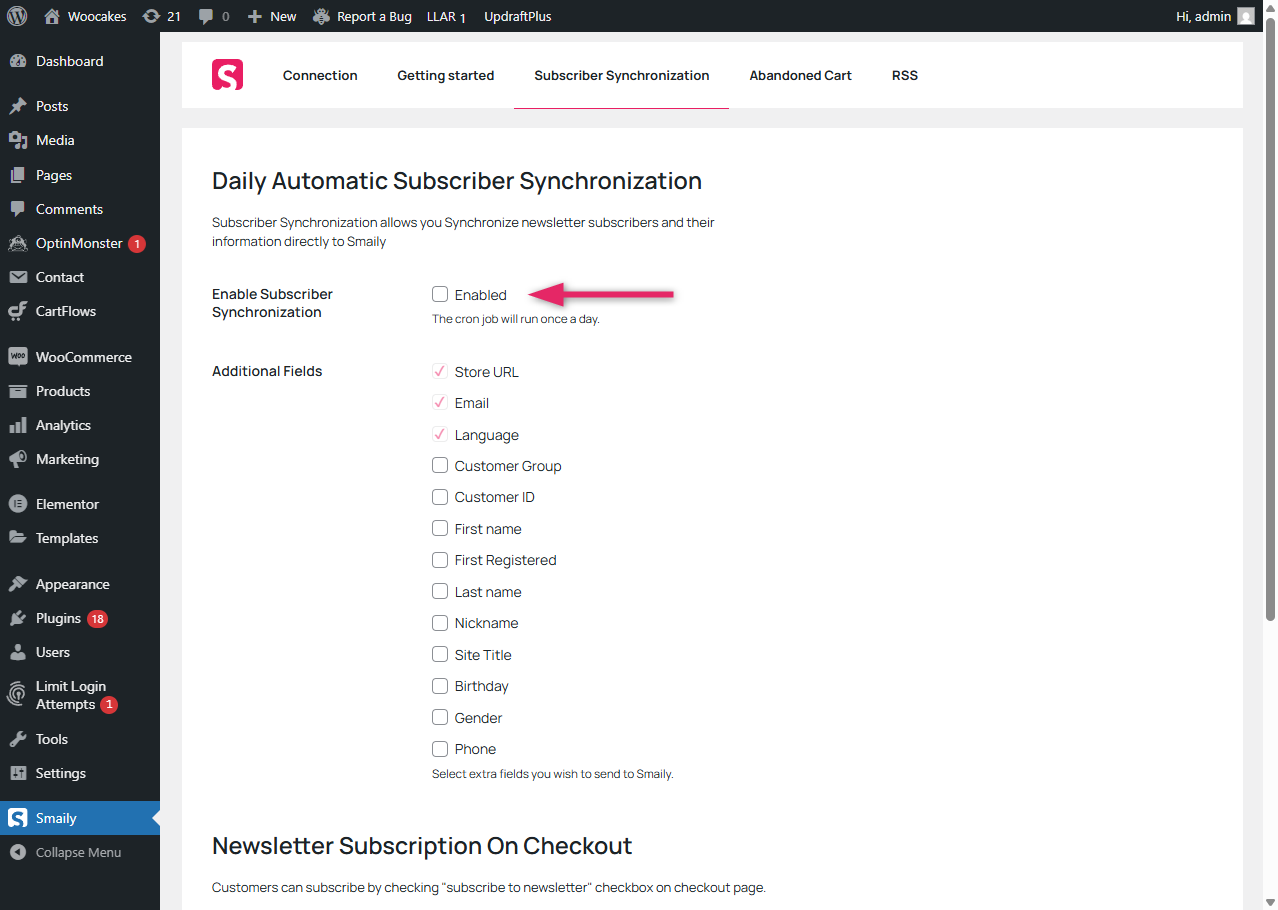
Subscriber Synchronization
If you have WooCommerce shop added to your page, you can activate subscriber synchronization, abandoned cart, RSS feed and collect subscribers during checkout.
Subscriber Synchronization allows you to synchronize newsletters subscribers directly from your store to Smaily. Enable Subscriber Synchronization under “Subscriber Synchronization” tab and select any additional fields you wish to send to Smaily. Click on “Save” to save any changes made and activate the subscriber synchronization.
Note! Subscribers will be sent to Smaily once a day!
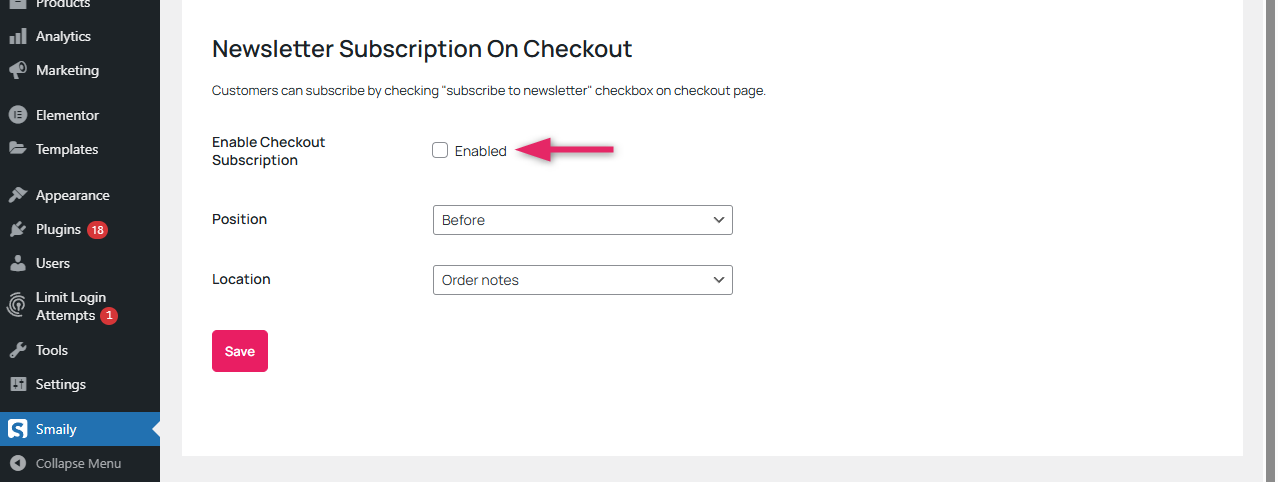
Newsletter Subscription On Checkout
Add a newsletter subscription checkbox to your checkout page. You can enable it under “Subscriber Synchronization” tab and choose the checkbox location and presets.
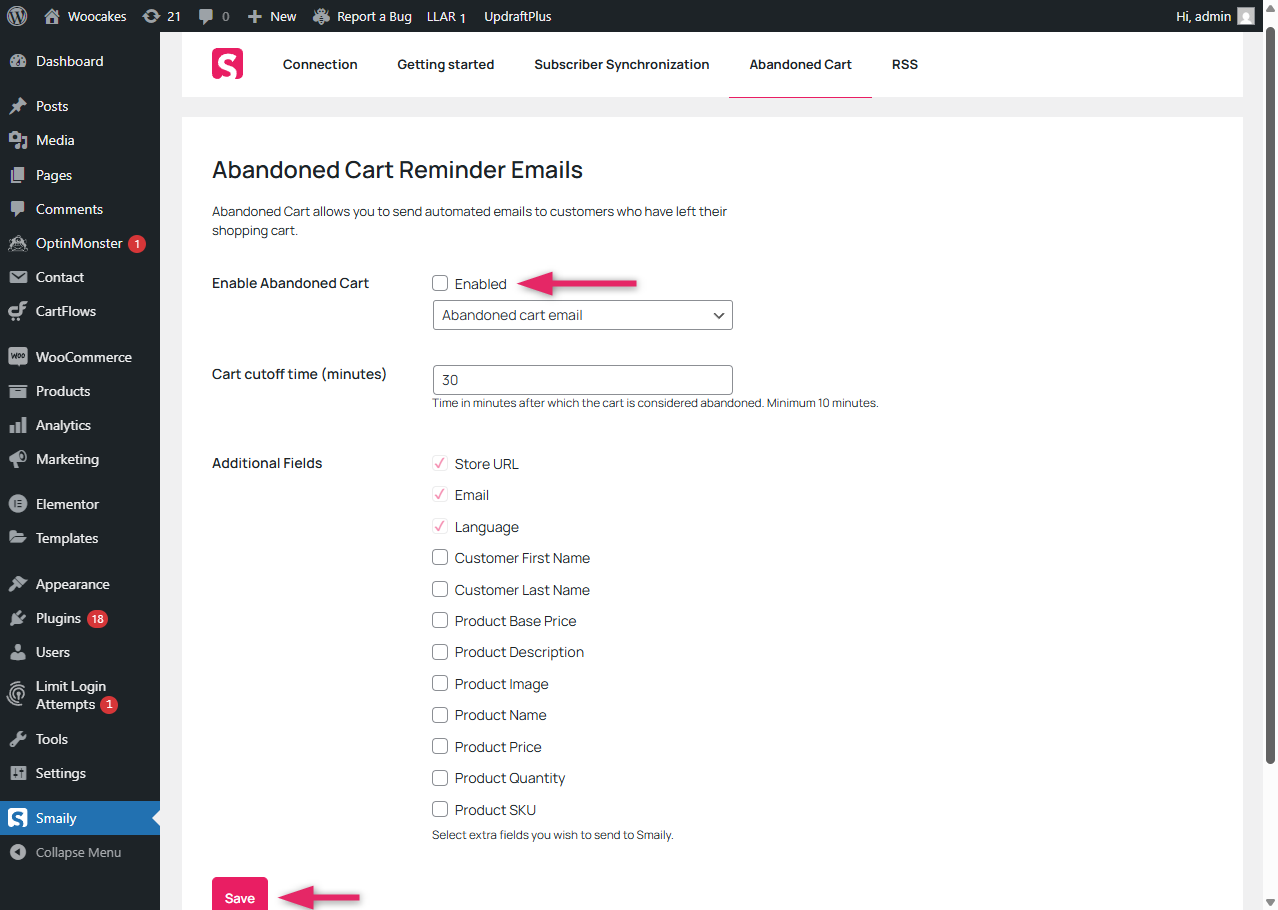
Abandoned cart
Abandoned Cart allows you to send automated emails to logged in customers who have left their shopping cart.
- Enable abandoned cart reminder under “Abandoned Cart” tab.
- Select the automation workflow (read how to set up abandoned cart automation workflow), cart cutoff time and all the additional fields you want to send to Smaily template.
- Click on “Save” to activate the Abandoned Cart flow.
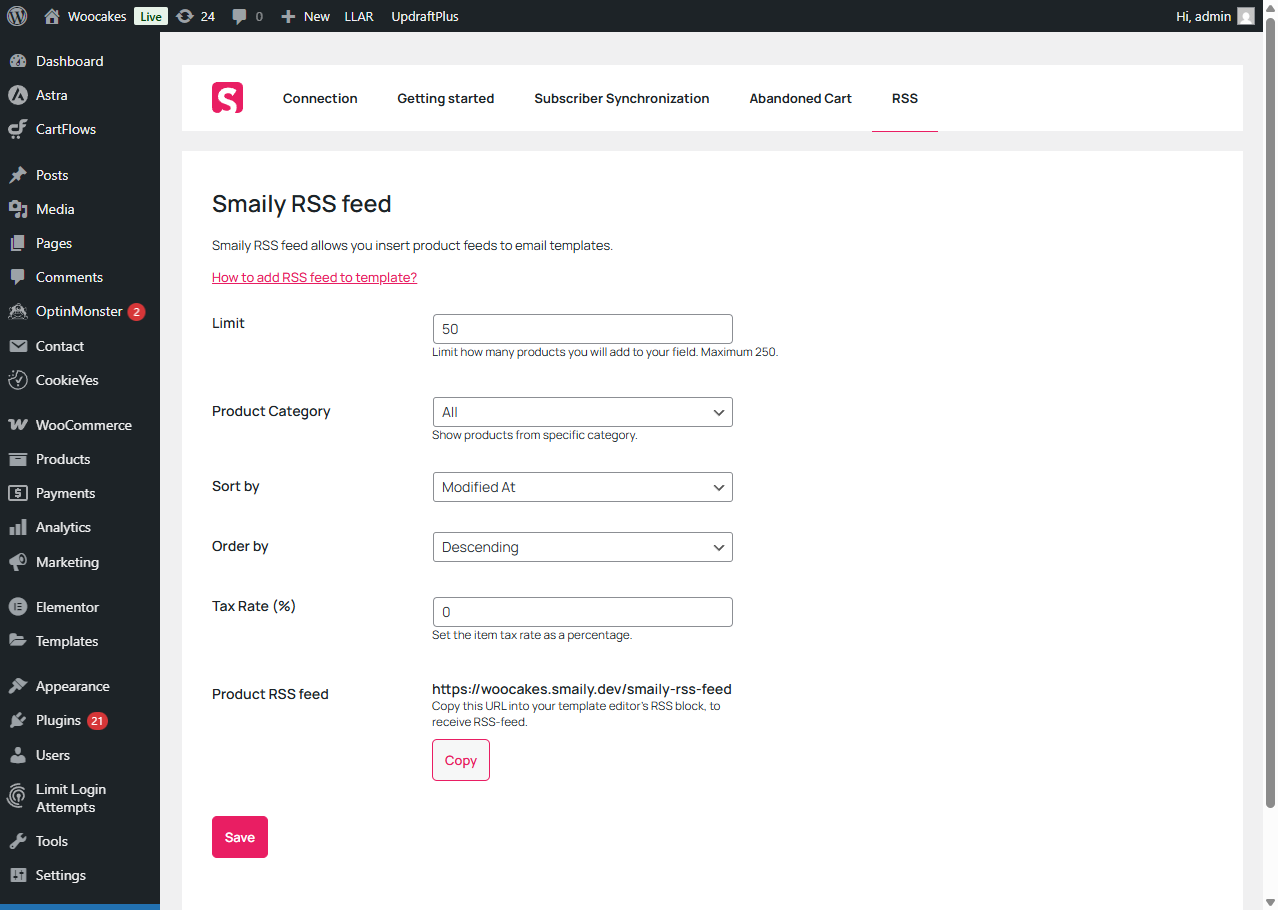
Smaily RSS feed
Smaily RSS feed allows you to effortlessly import up to 250 latest products to Smaily template. You can customize generated RSS feed based on product categories and limit generated RSS feed products amount with preferred value.
The RSS feed settings can be found under “RSS” tab. To use the feed, choose the preferred settings, save and copy the URL into Smaily template editors RSS block. Read more about Smaily RSS feed element.