
How to set up an automated welcome email workflow for integrations and forms?
If you want to send an automatic welcome email to your new subscribers, an automated workflow should be created.
Creating the template
- Go to the templates tab and click “New template”.
- Choose a suitable template or pick a ready-made welcome email template.
- Design the styles and text of the template to fit your brand.
Read more about creating templates from our creating a drag and drop template tutorial.
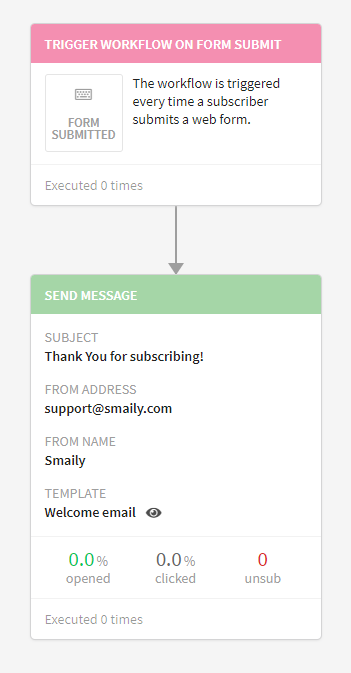
Setting up an automation workflow
- To create an automation workflow, go to the automations tab and click “New automation”.
- Name the workflow (only displayed in the user view) and set “Form submitted” as the trigger.
- Next action is “Send message”.
- Set up the element for sending a message by adding a subject, sender’s address and name and choose the previously created template.
- Once the automation workflow is created, save the automation and start the workflow in the automations view.
If the automated workflow has to be connected to a form:
- You’ll get the automation workflow ID needed for integration by opening the workflow and copying the number at the end of the URL – that’s the ID.
If the automation has to be connected to a plugin:
- The automation should appear in the automations options in the plugin once the automated workflow has been created and started. Refresh the page if necessary.
The automated workflow should look like this:
Example automation ID:
subdomain.sendsmaily.net/automation/overview/id/32 – 32 that’s the ID