How to share user rights?
By sharing user rights, you can determine who has access to your Smaily account.
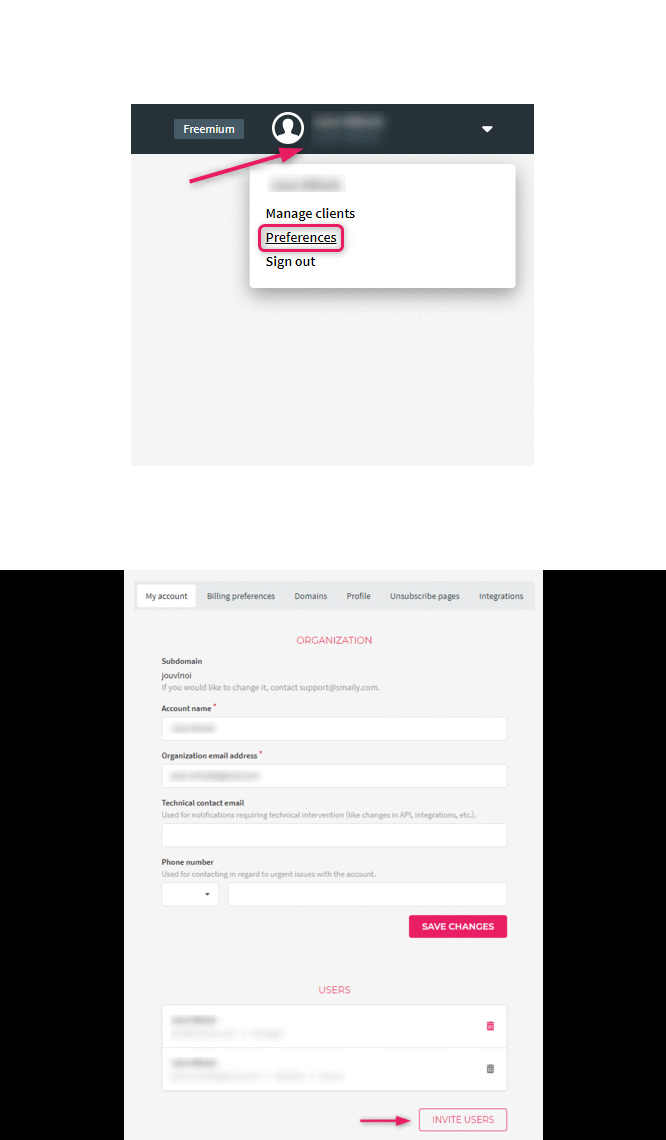
- Click on the upper right corner on your user name.
- Click on “Settings” in the dropdown menu.
- Account settings will open.
- You can add and manage users under the “My account” tab.
- To send a user invite, click “Invite users”.
- Insert the email address you want to send the invite to in the pop-up window and choose the user role.
- Click “OK” to send the invitation.
User roles:
- Manager – User has full access to the account.
- Editor – User has full access, except for billing, user management, integrations, and domain management.
- Template editor – User can only manage templates.
A user invite will be sent to the selected email address. The new user will have to select an account with which they want to authenticate themselves with (Google, Facebook, LinkedIn or Microsoft). The invitation is valid for 72 hours. If the new user fails to log in during that time, it’s possible to resend the invitation.
Note! When assigning template editor role to a user, the user can access the account directly from {{account}}.sendsmaily.net/templates url, e.g https://mysmailyaccount.sendsmaily.net/templates, or is directed to the templates page after logging in. Other account tabs will be inaccessible and will show an error message.
Note! When logging onto your account, always use the same form of authentication as the first time. Otherwise a new account will be created. E.g. if you logged onto the account using your Facebook account, you should always use your Facebook account to log in. If you happen to use your Google account for logging in next time, a new account will be created.
