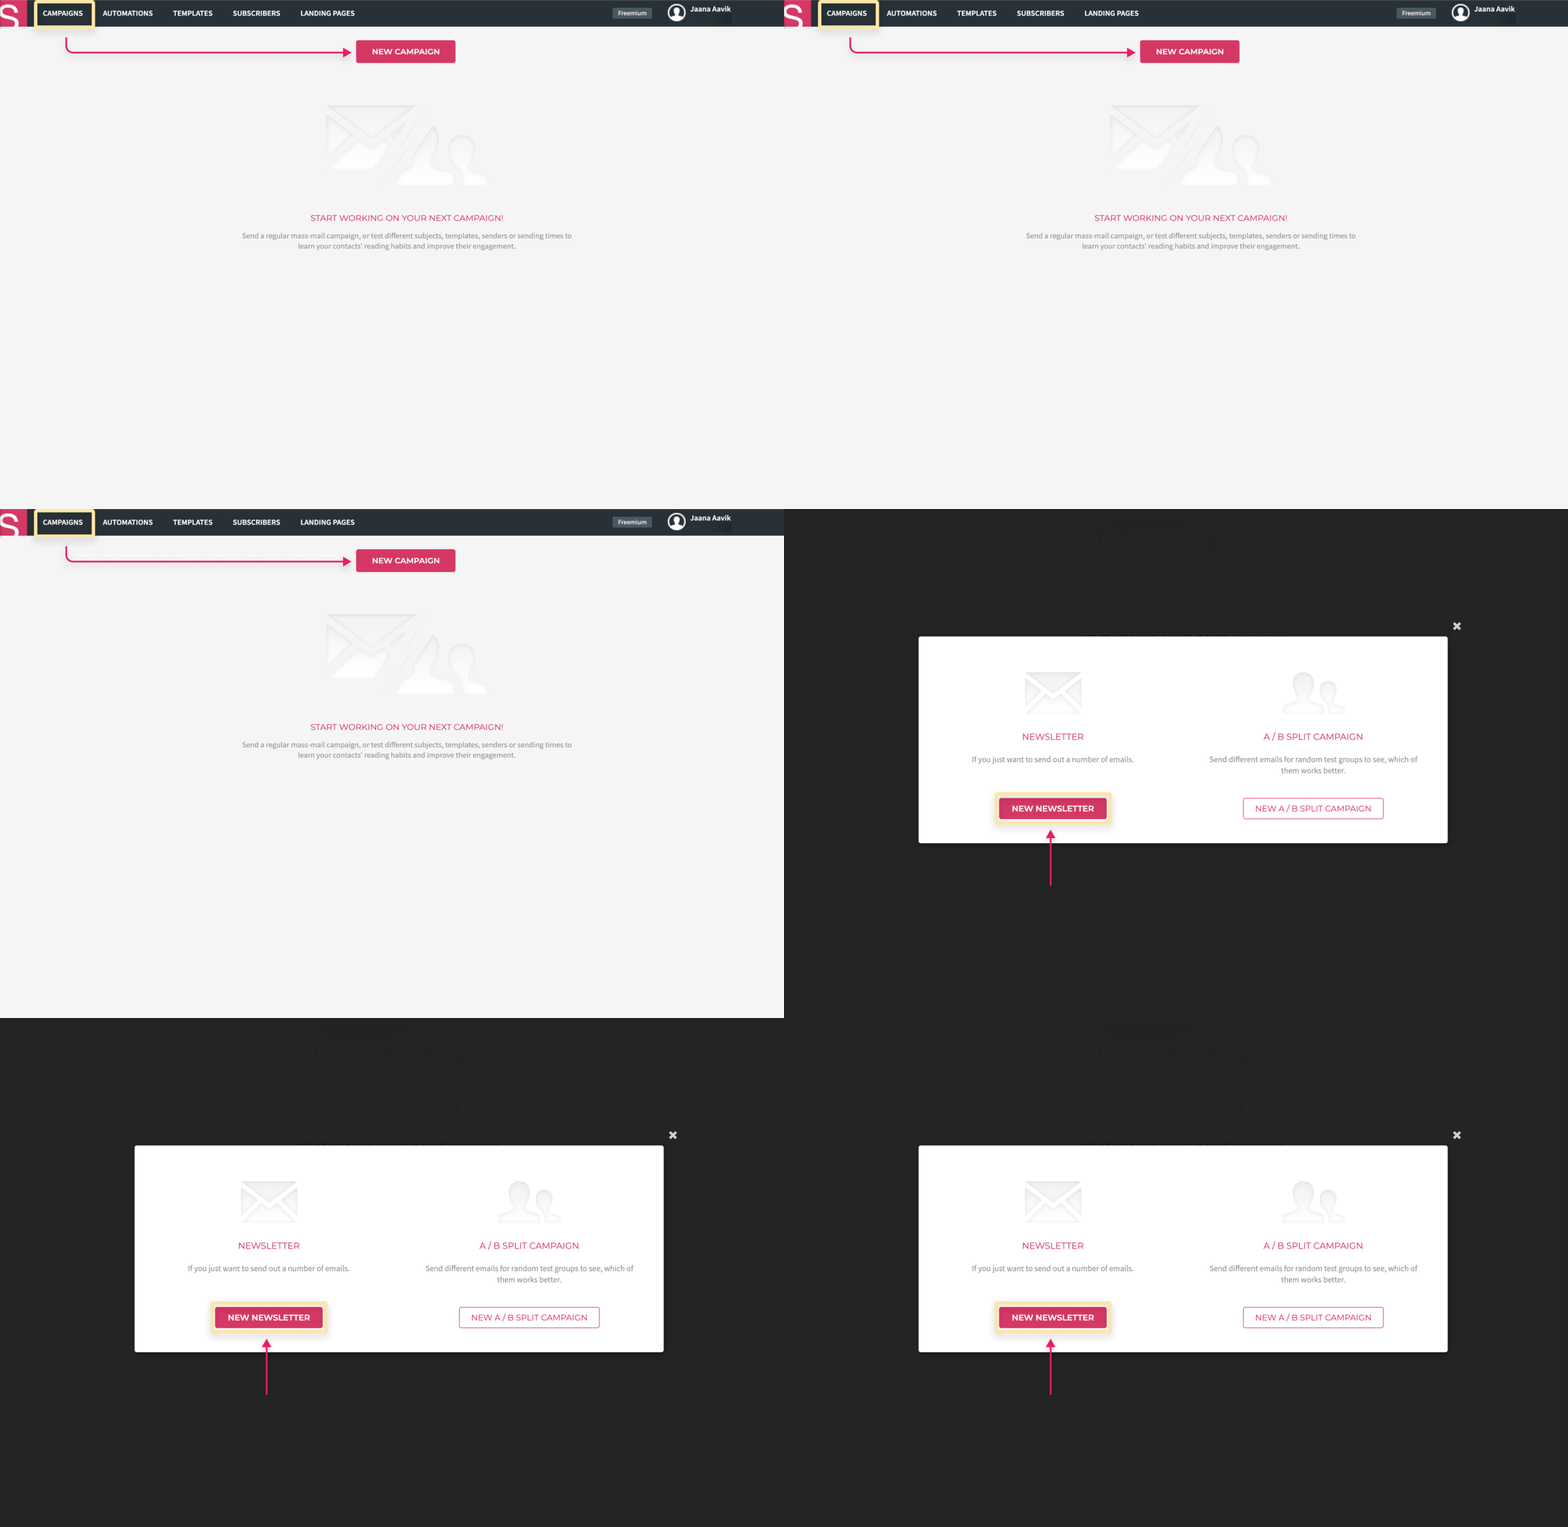
Adding campaign information
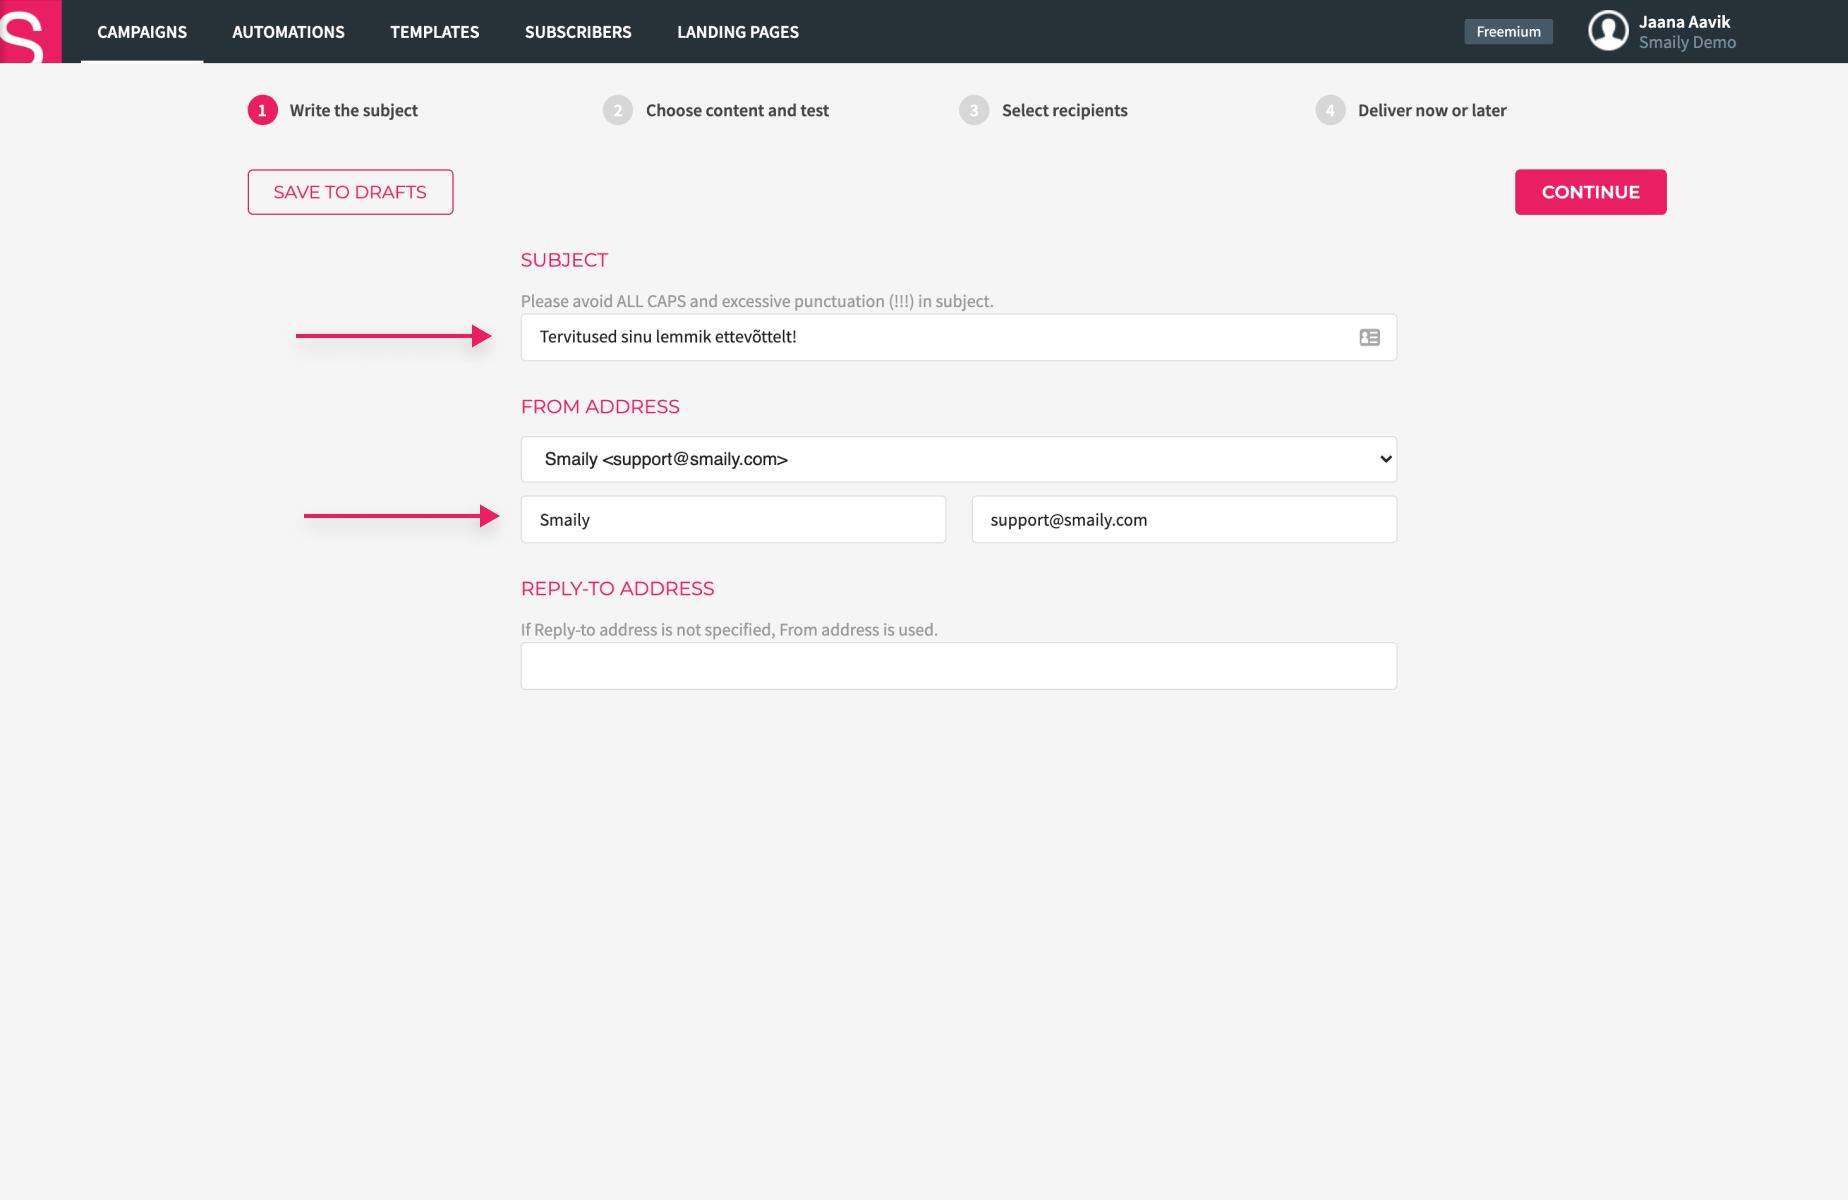
- Give your campaign a title (the “Subject” of the email – title, that will be displayed in the recipient’s inbox).
2. Choose a suitable sender’s address from the dropdown menu (“From address”). If you can’t find a suitable address from the menu, choose “New address” and fill in the sender’s name and email address fields.
3. If you wish to receive replies on a different address than the sender’s address, add a reply-to address.
4. After filling in the obligatory title and sender’s address fields, click “Continue”.
Choosing the content and testing
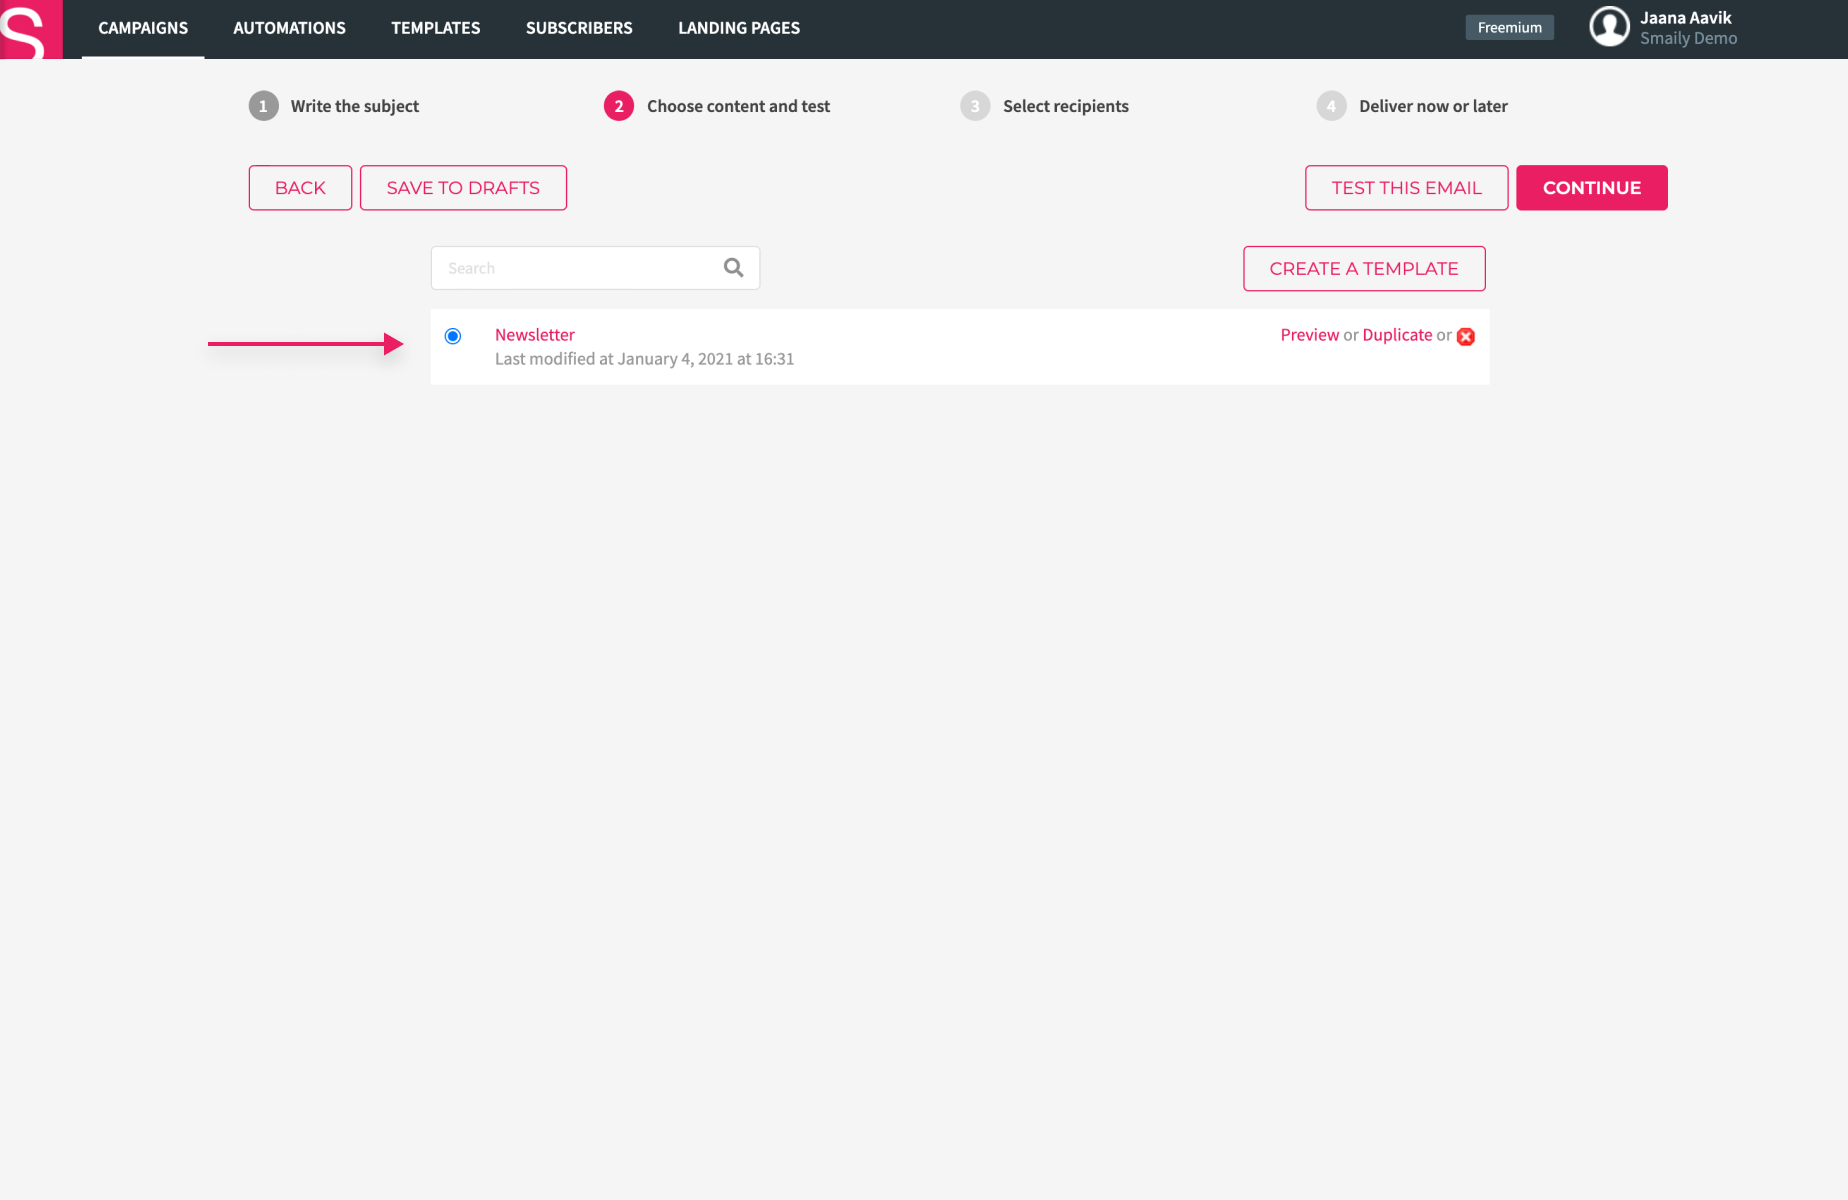
- To choose an email template, pick one from the previously created templates.
- To choose the best option, you can test out your email (more information in our “Testing your post” tutorial. To create a template, read our tutorial “Create a Drag and Drop Template”).
- Once you’ve chosen a suitable template and tested it successfully, click “Continue”.
Final check and launching
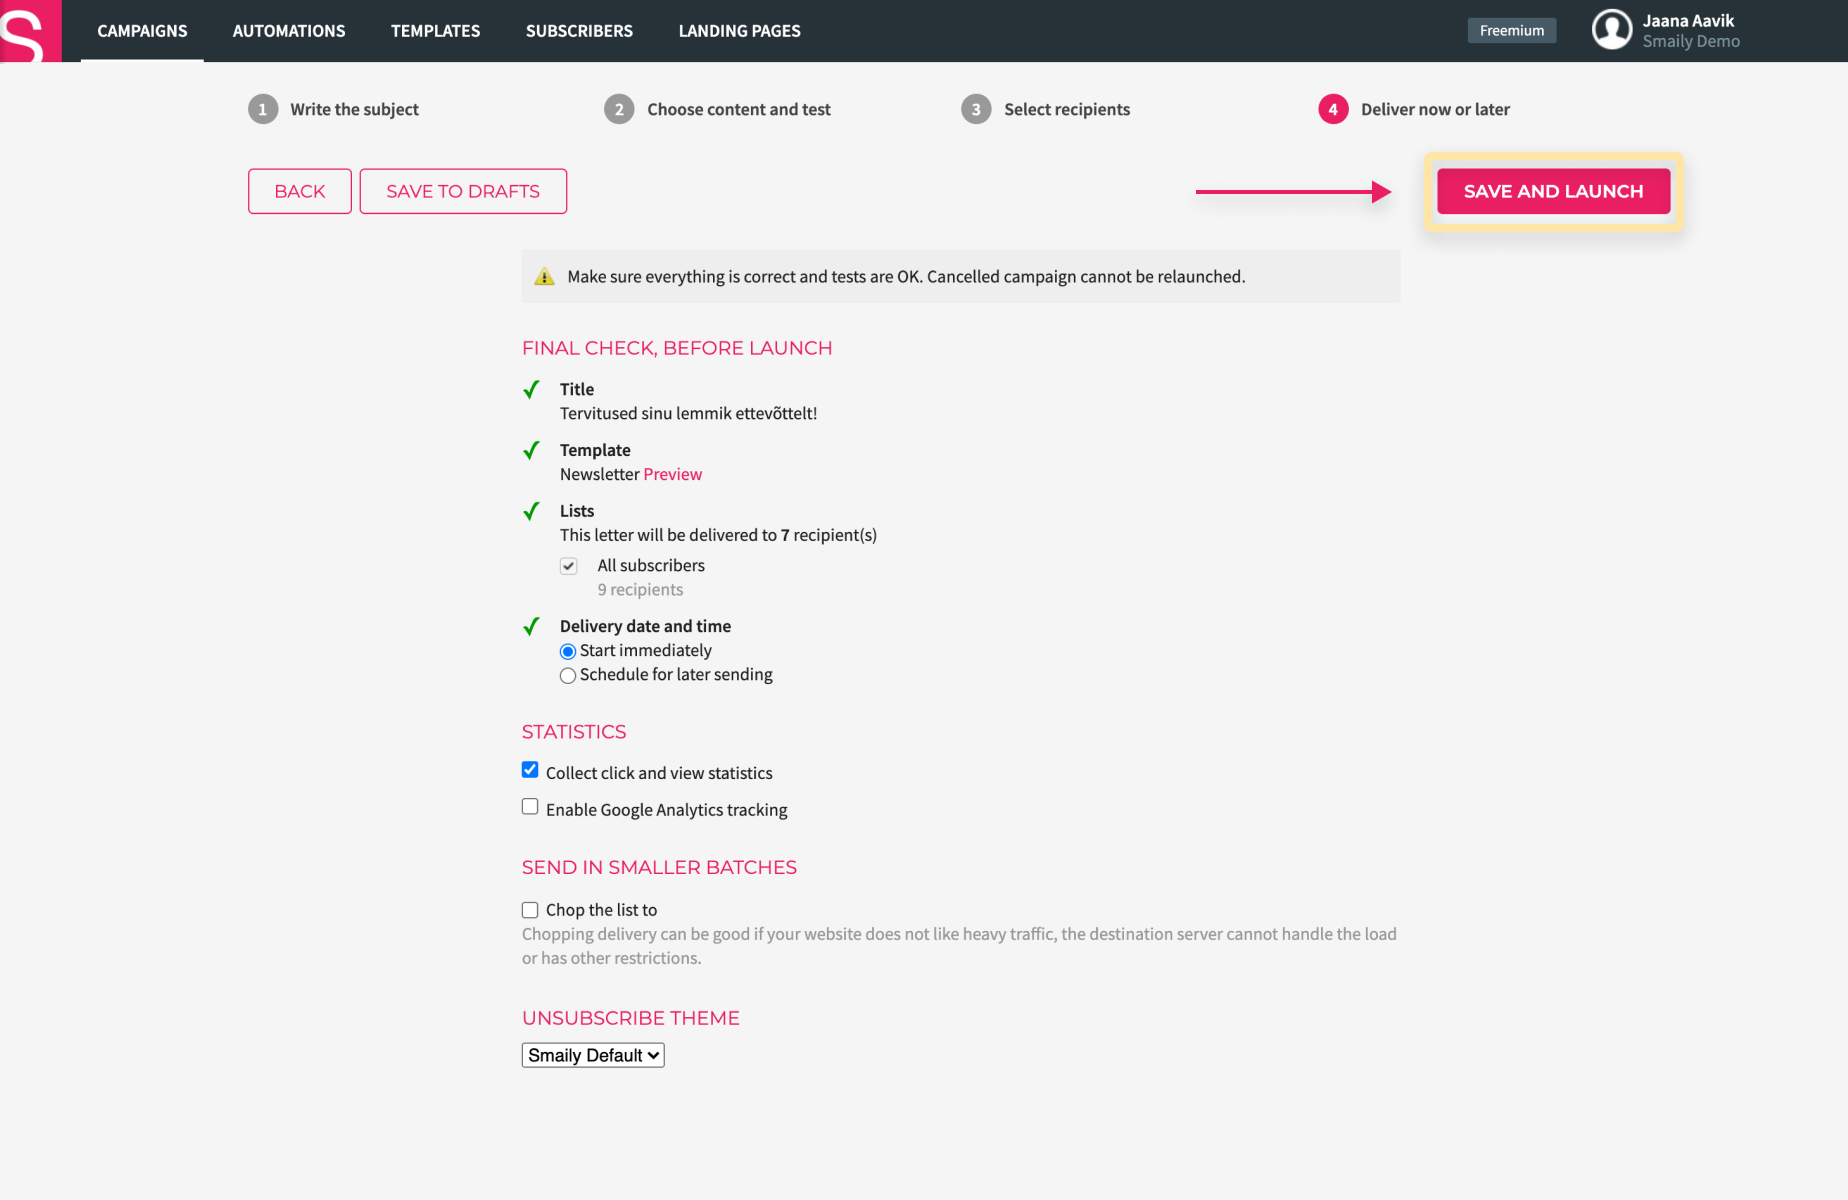
- Make sure all the previous steps have been done correctly.
- Press “Save and launch” if you want to send your post out right away.
- If you want to schedule the post for a later time, choose “Schedule for later” under the time and date selection.
- Determine the date and time of your post and press “Save and launch”.
- To send the post out in smaller fragments, tick the box in front of “Send in smaller batches” and set your desired parameters.


