How to create a drag and drop template?
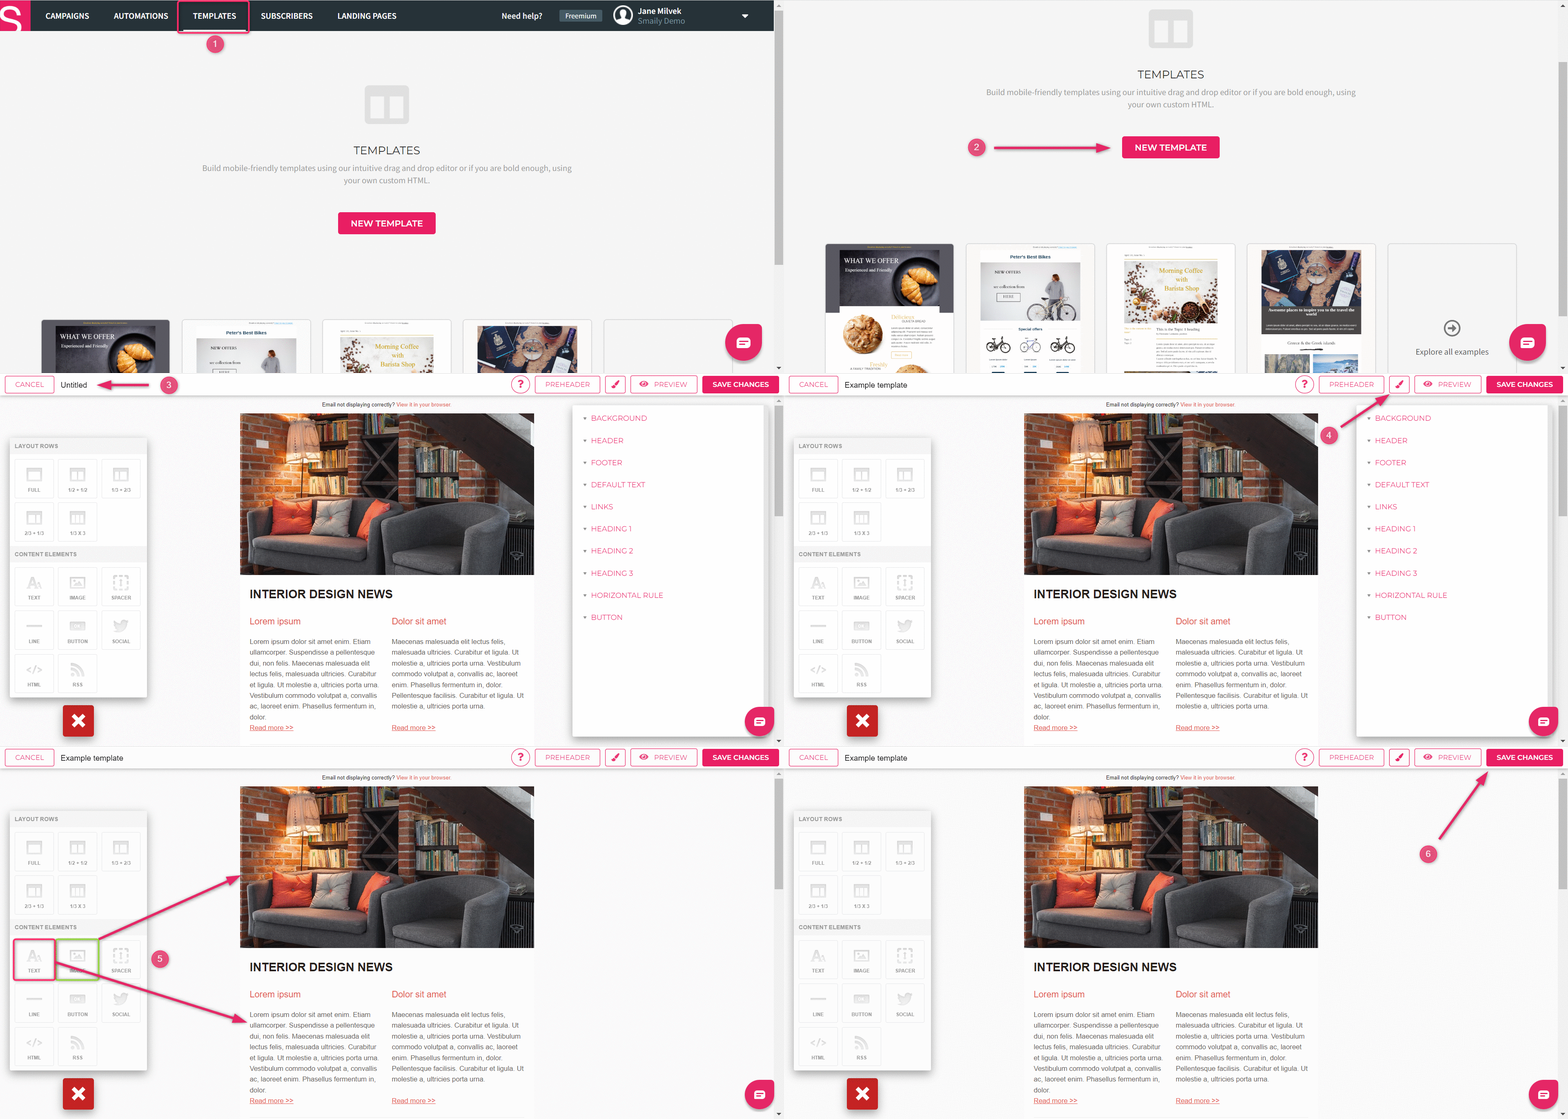
- To create a drag and drop email template, go to the “Templates” tab.
- Click on “New template” or one of the examples.
- Choose your preferred drag and drop template example design.
- Add a name to your template to differentiate your templates later.
- From paintbrush-shaped button opens (and closes) the “Customize styles” menu in the upper right corner. You can format the main style elements of the template in this menu (e.g. set background, button and line colors, customize texts and links), which will apply automatically. Read more here.
- To structurize your email, choose a preferred layout row from the left-side menu under the “+” button. You can also use layout rows to create the design of your email (e.g. change the background color).
- Drag your preferred content elements (e.g. texts, images, buttons etc.) into the layout rows.
- Images will be scaled to an appropriate size and will automatically be formatted for mobile view. Read on how to add images to templates here.
- To save your template, click on “Save changes” in the upper right corner.
Note! Templates will not be saved automatically. Always save the template after being done with the changes. If the creation process takes longer, we recommend saving changes during the process as well.
For more detailed introduction to the templates view video here.
