How to create a birthday automation workflow?
You can set up an automation workflow to send birthday greetings or promotional codes to your subscribers. A birthday parameter with a birth date has to be added to the subscriber in the database (format YYYY-MM-DD). You can read from our tutorial “How to import subscribers’ birthdays” on how to add subscribers’ birthdays to your database.
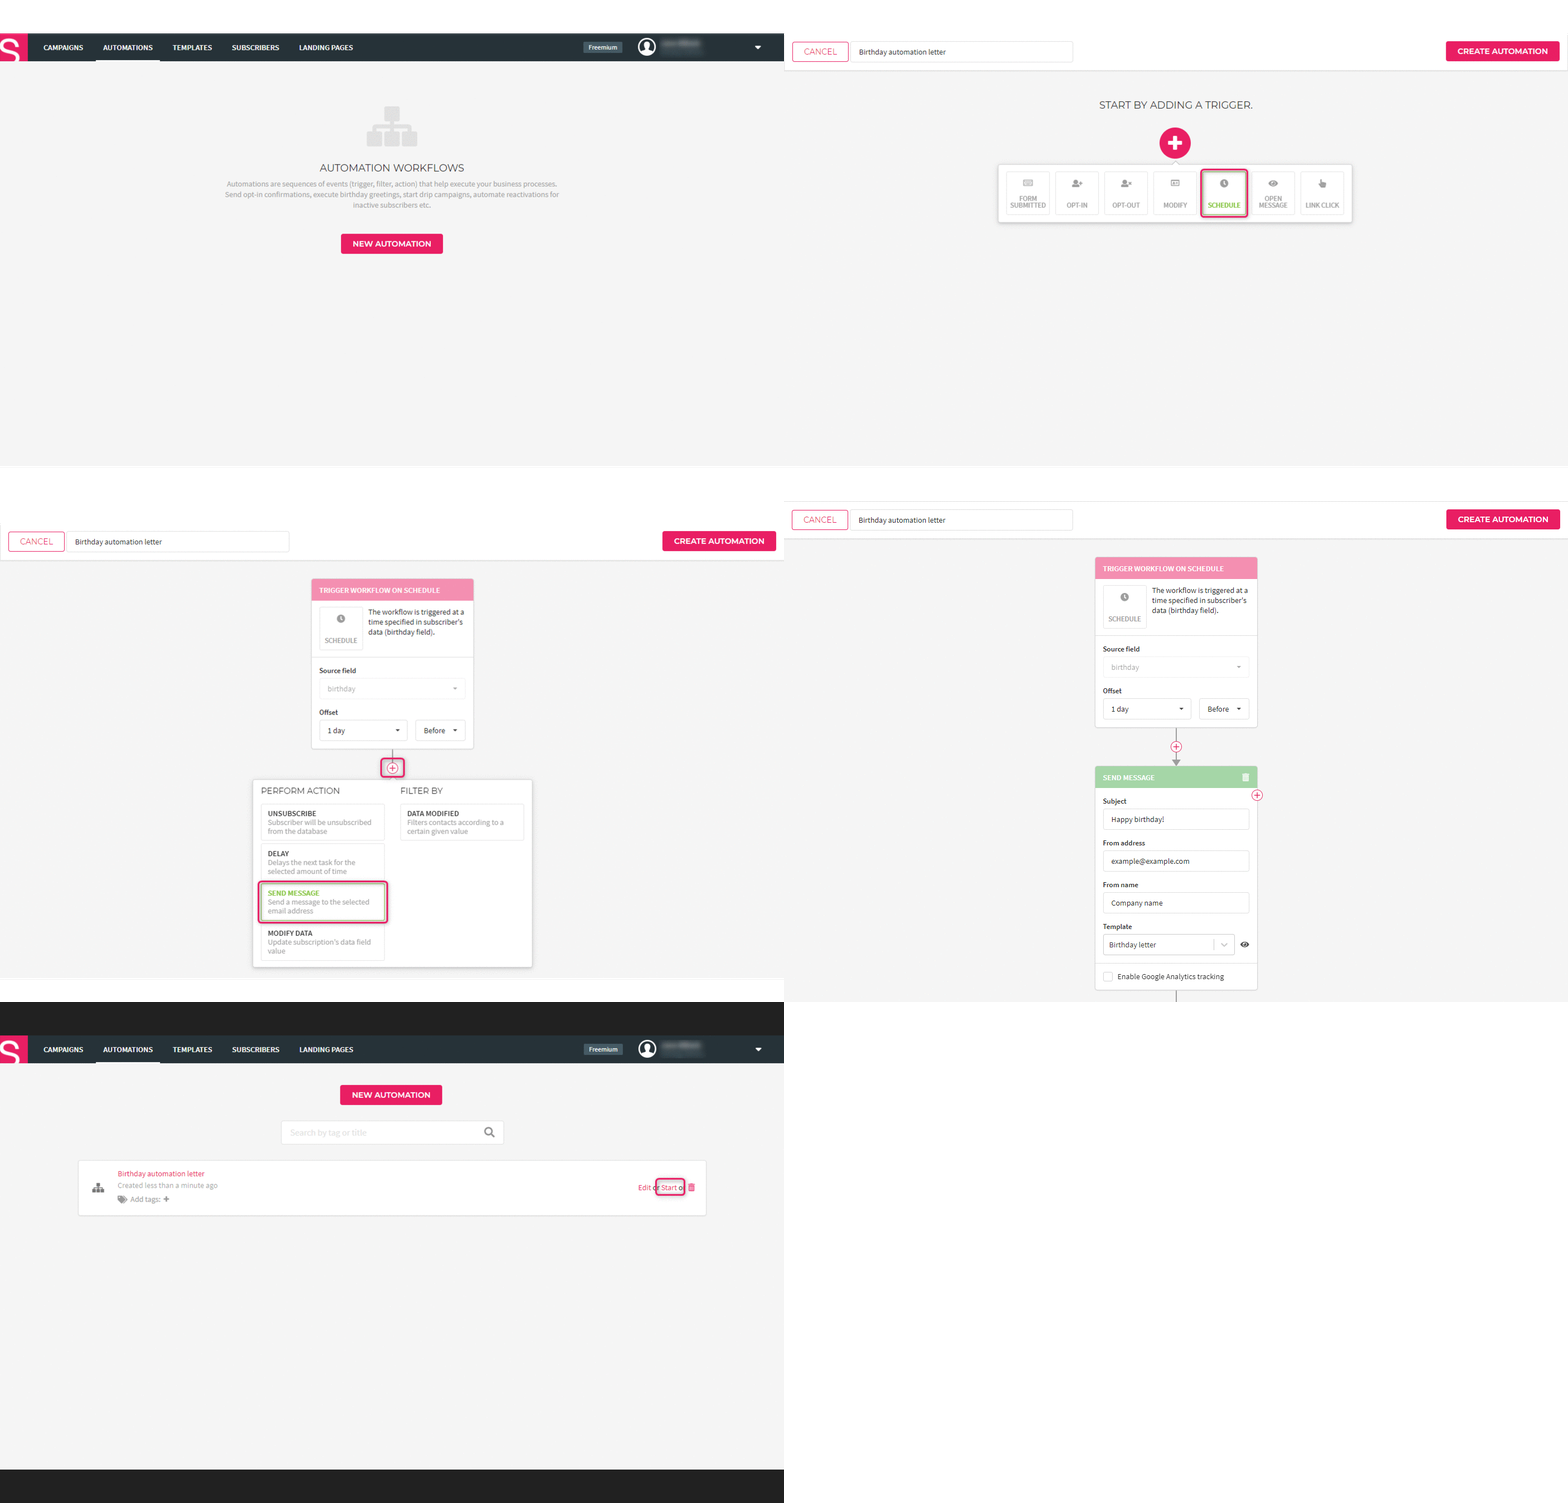
- To create a birthday automation, go to the “Automations” tab and click on “New automation”.
- Add a name to your automation workflow.
- To add a trigger, click on the “+” sign.
- To create a birthday automation, choose “Schedule” trigger.
The workflow will be launched on a specific date given under the subscribers data (birthday field). You can choose a time delay to send the email at a specific time before or after the birthday.
- To send an email to the subscriber, click on the “+” sign and choose action “Send message”.
- Insert a subject of the email, sender’s address and choose a suitable template.
- Once all the necessary settings have been set, click “New automation”.
- When you’ve saved the automation you can start it in the automations tab by clicking on “Start”.
